Tables
The table component in DataSiv enables you to display and edit data (e.g. from a SQL database, a Google Sheets UI, Zendesk, or Salesforce) from a table view.
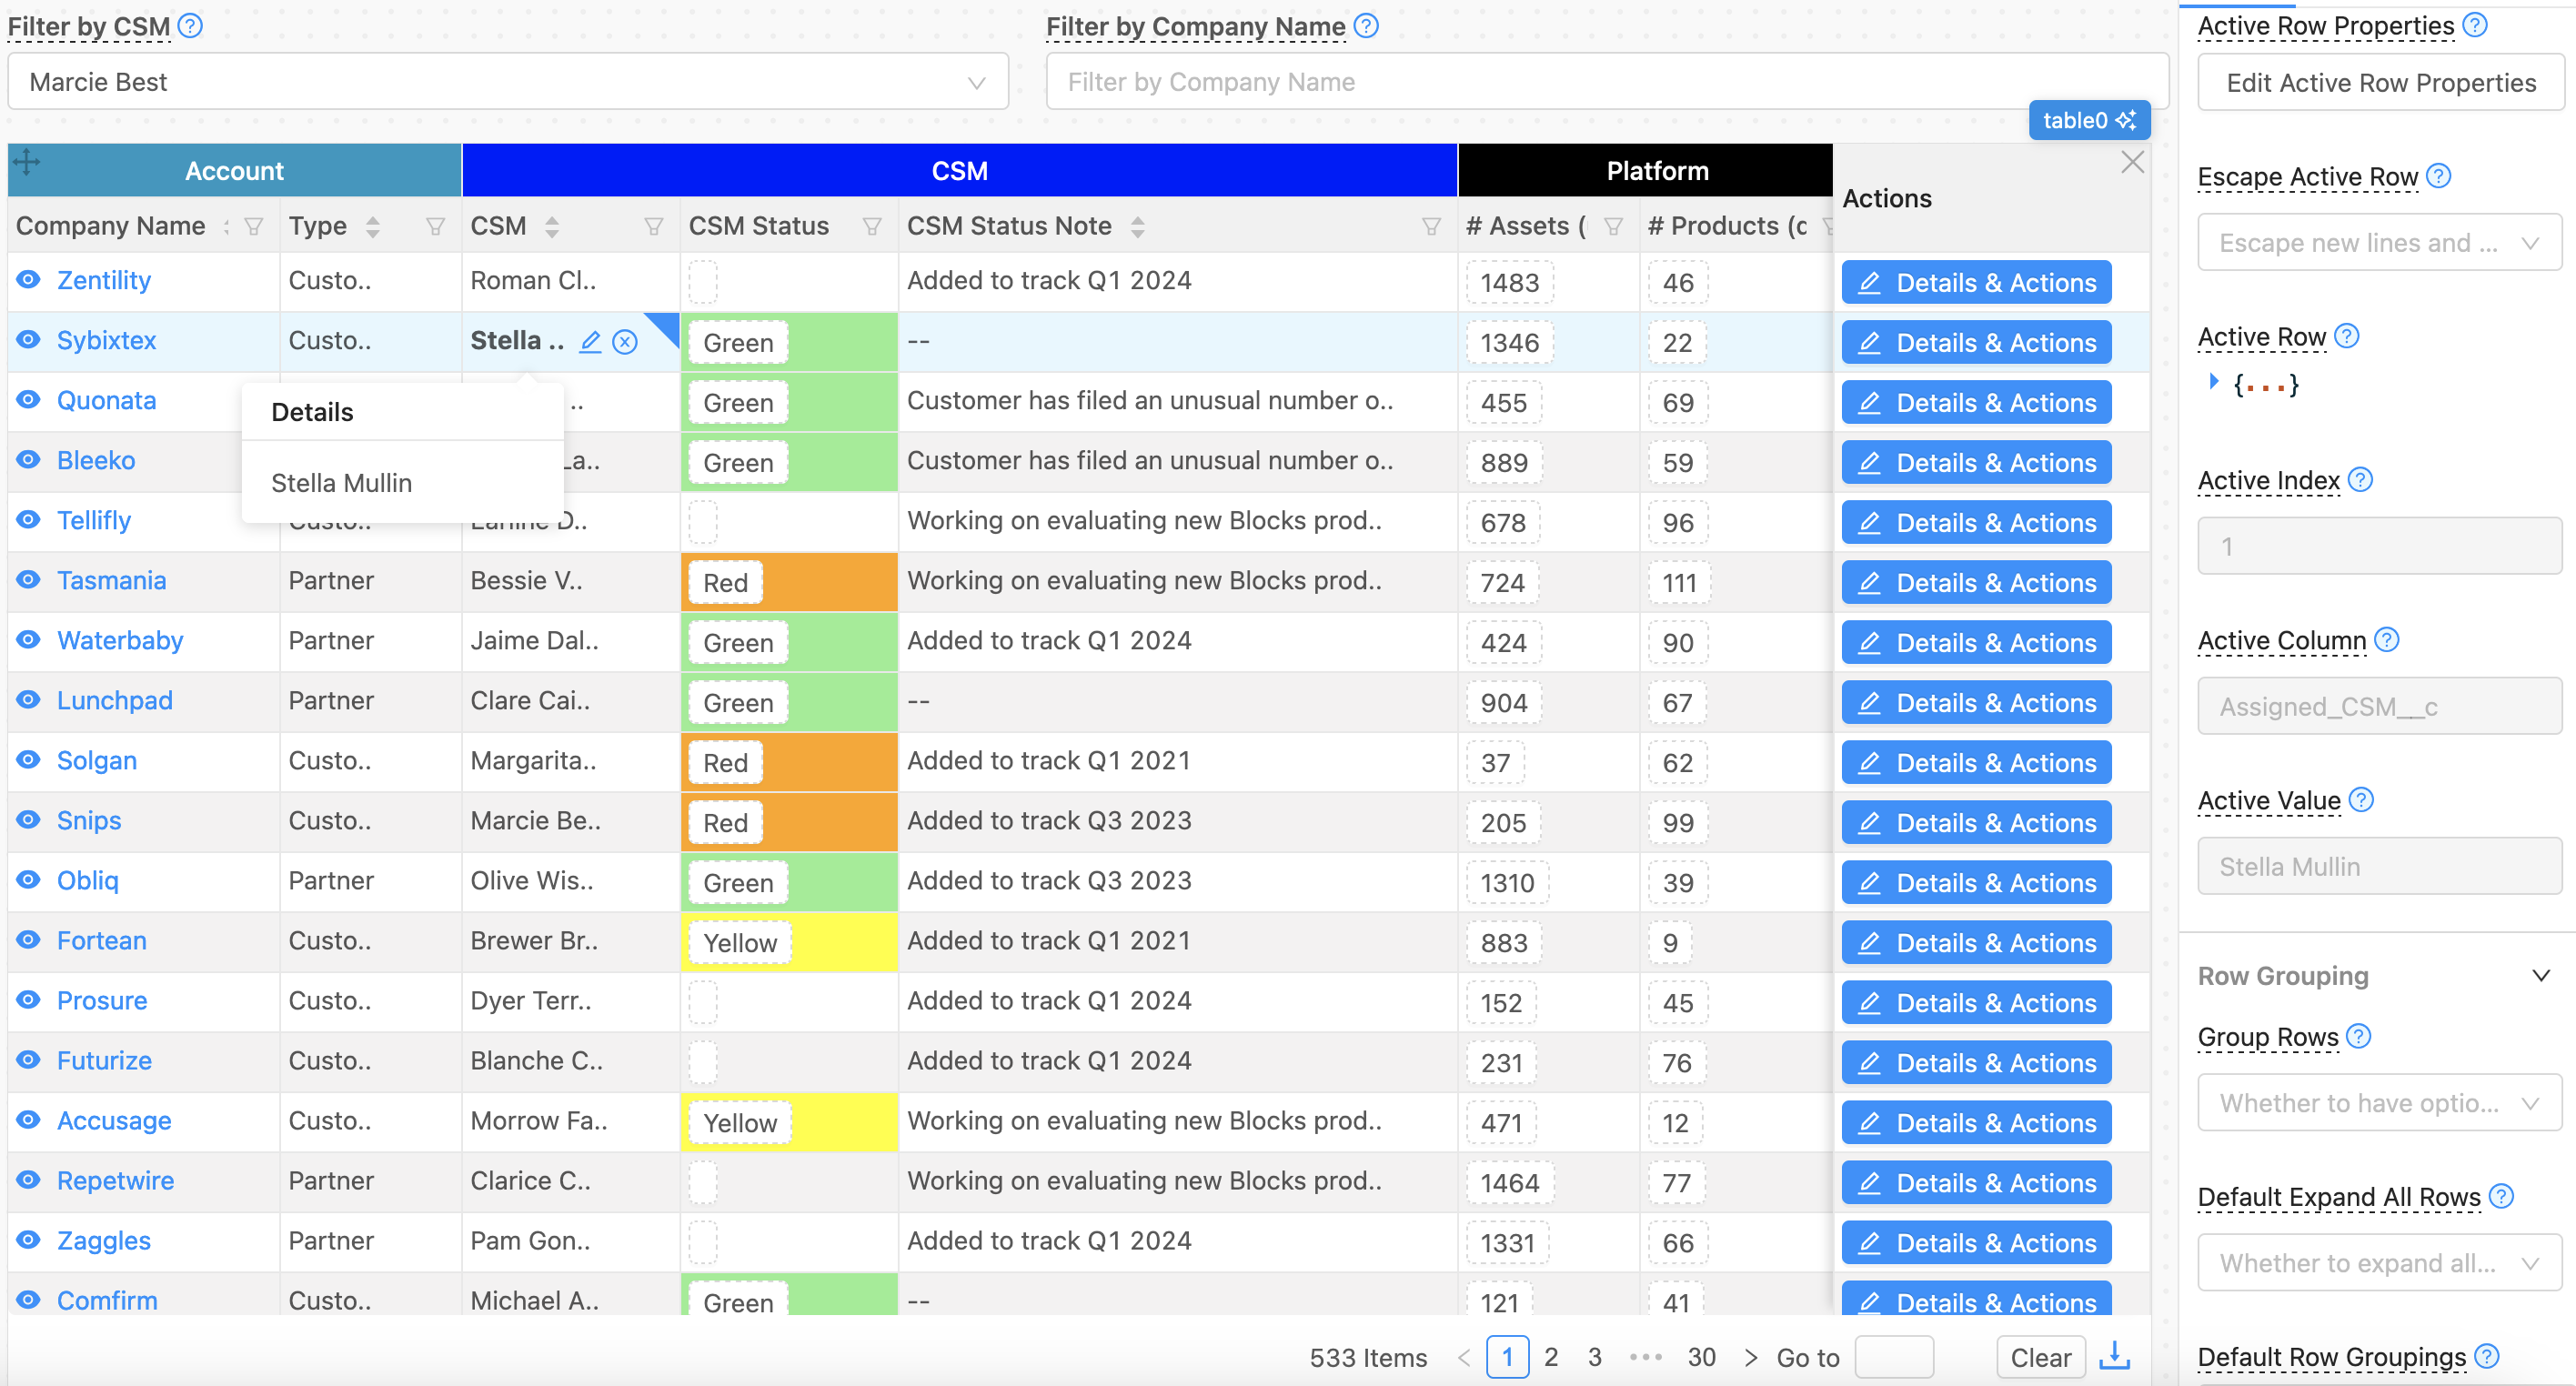
You first start off by connecting your data to the data property.
Use transforms to preprocess data before display it in a tableTransforms enable you to take the output of a data query (e.g. an array of items), and preprocess it before displaying it in a table. If you want to only display certain columns, or have control over what data is displayed in a table, use a transform! Overview provides an overview of how transforms work.
Changing column colors quickstart
To change the color of a column, first add the column name that you want to change the color of on the right hand menu.
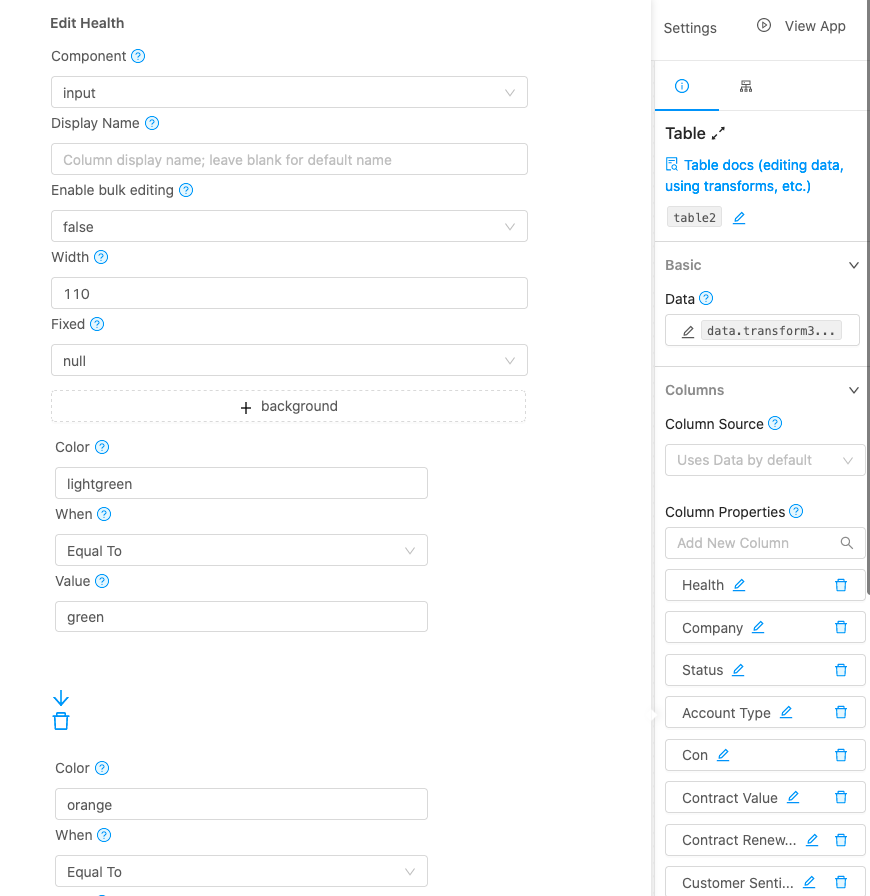
The comparison applies to the current column property. For example, numerical and string values can use the greater Than or Equal To conditions. Click the + background button, and you should be able to change colors under various conditions.
To reference other columns in the same table, use the {{dynamic}} keywordE.g., {{dynamic.Status}}
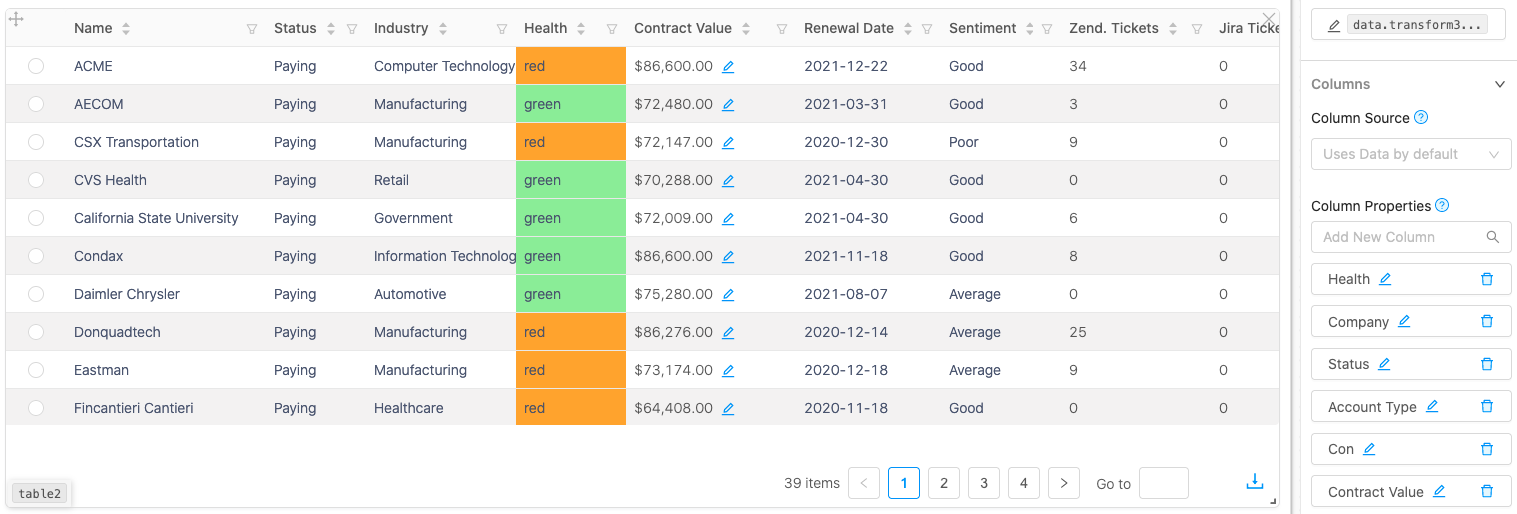
You should now be good to go! The Health column should now have varying colors of green, red, orange etc.
Editing rows quickstart
If you need to enable users to modify rows, one row at a time, the fastest way to do it is as follows.
- Set the Selected Row property to
single. This will enable users to select rows from the table, one at a time. You'll be able to reference all the columns from the table via the Selected Row property, which stores an array of selected rows. In the instance when Selected Row is set tosingle, the Selected Row property will always be an array with only one value--the current selected row.
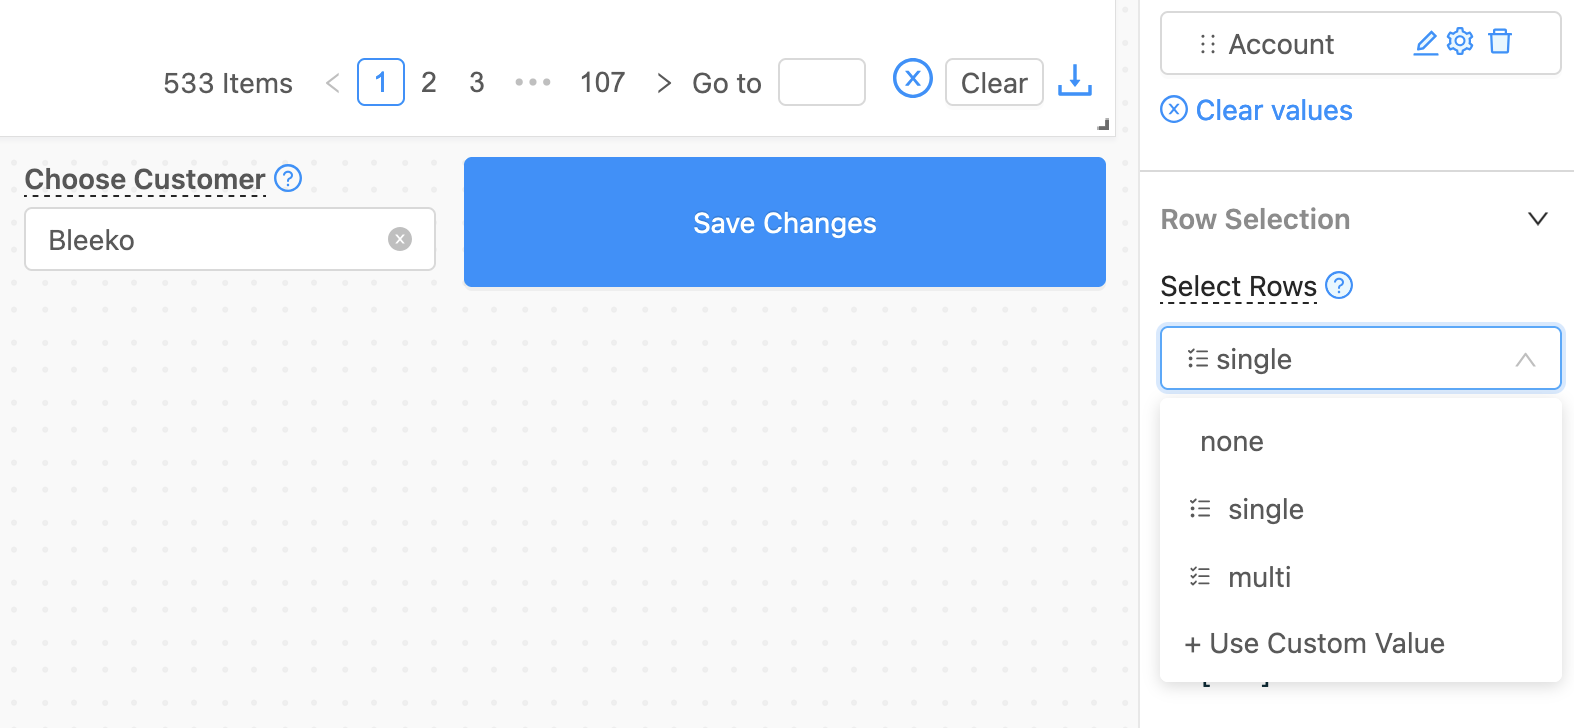
Drag a data input component into the grid, (e.g. an input), and set the default value property to be the value of the Selected Row in the table. For a text input, this is Default Text, while for a select input, this is Default Selected Item.
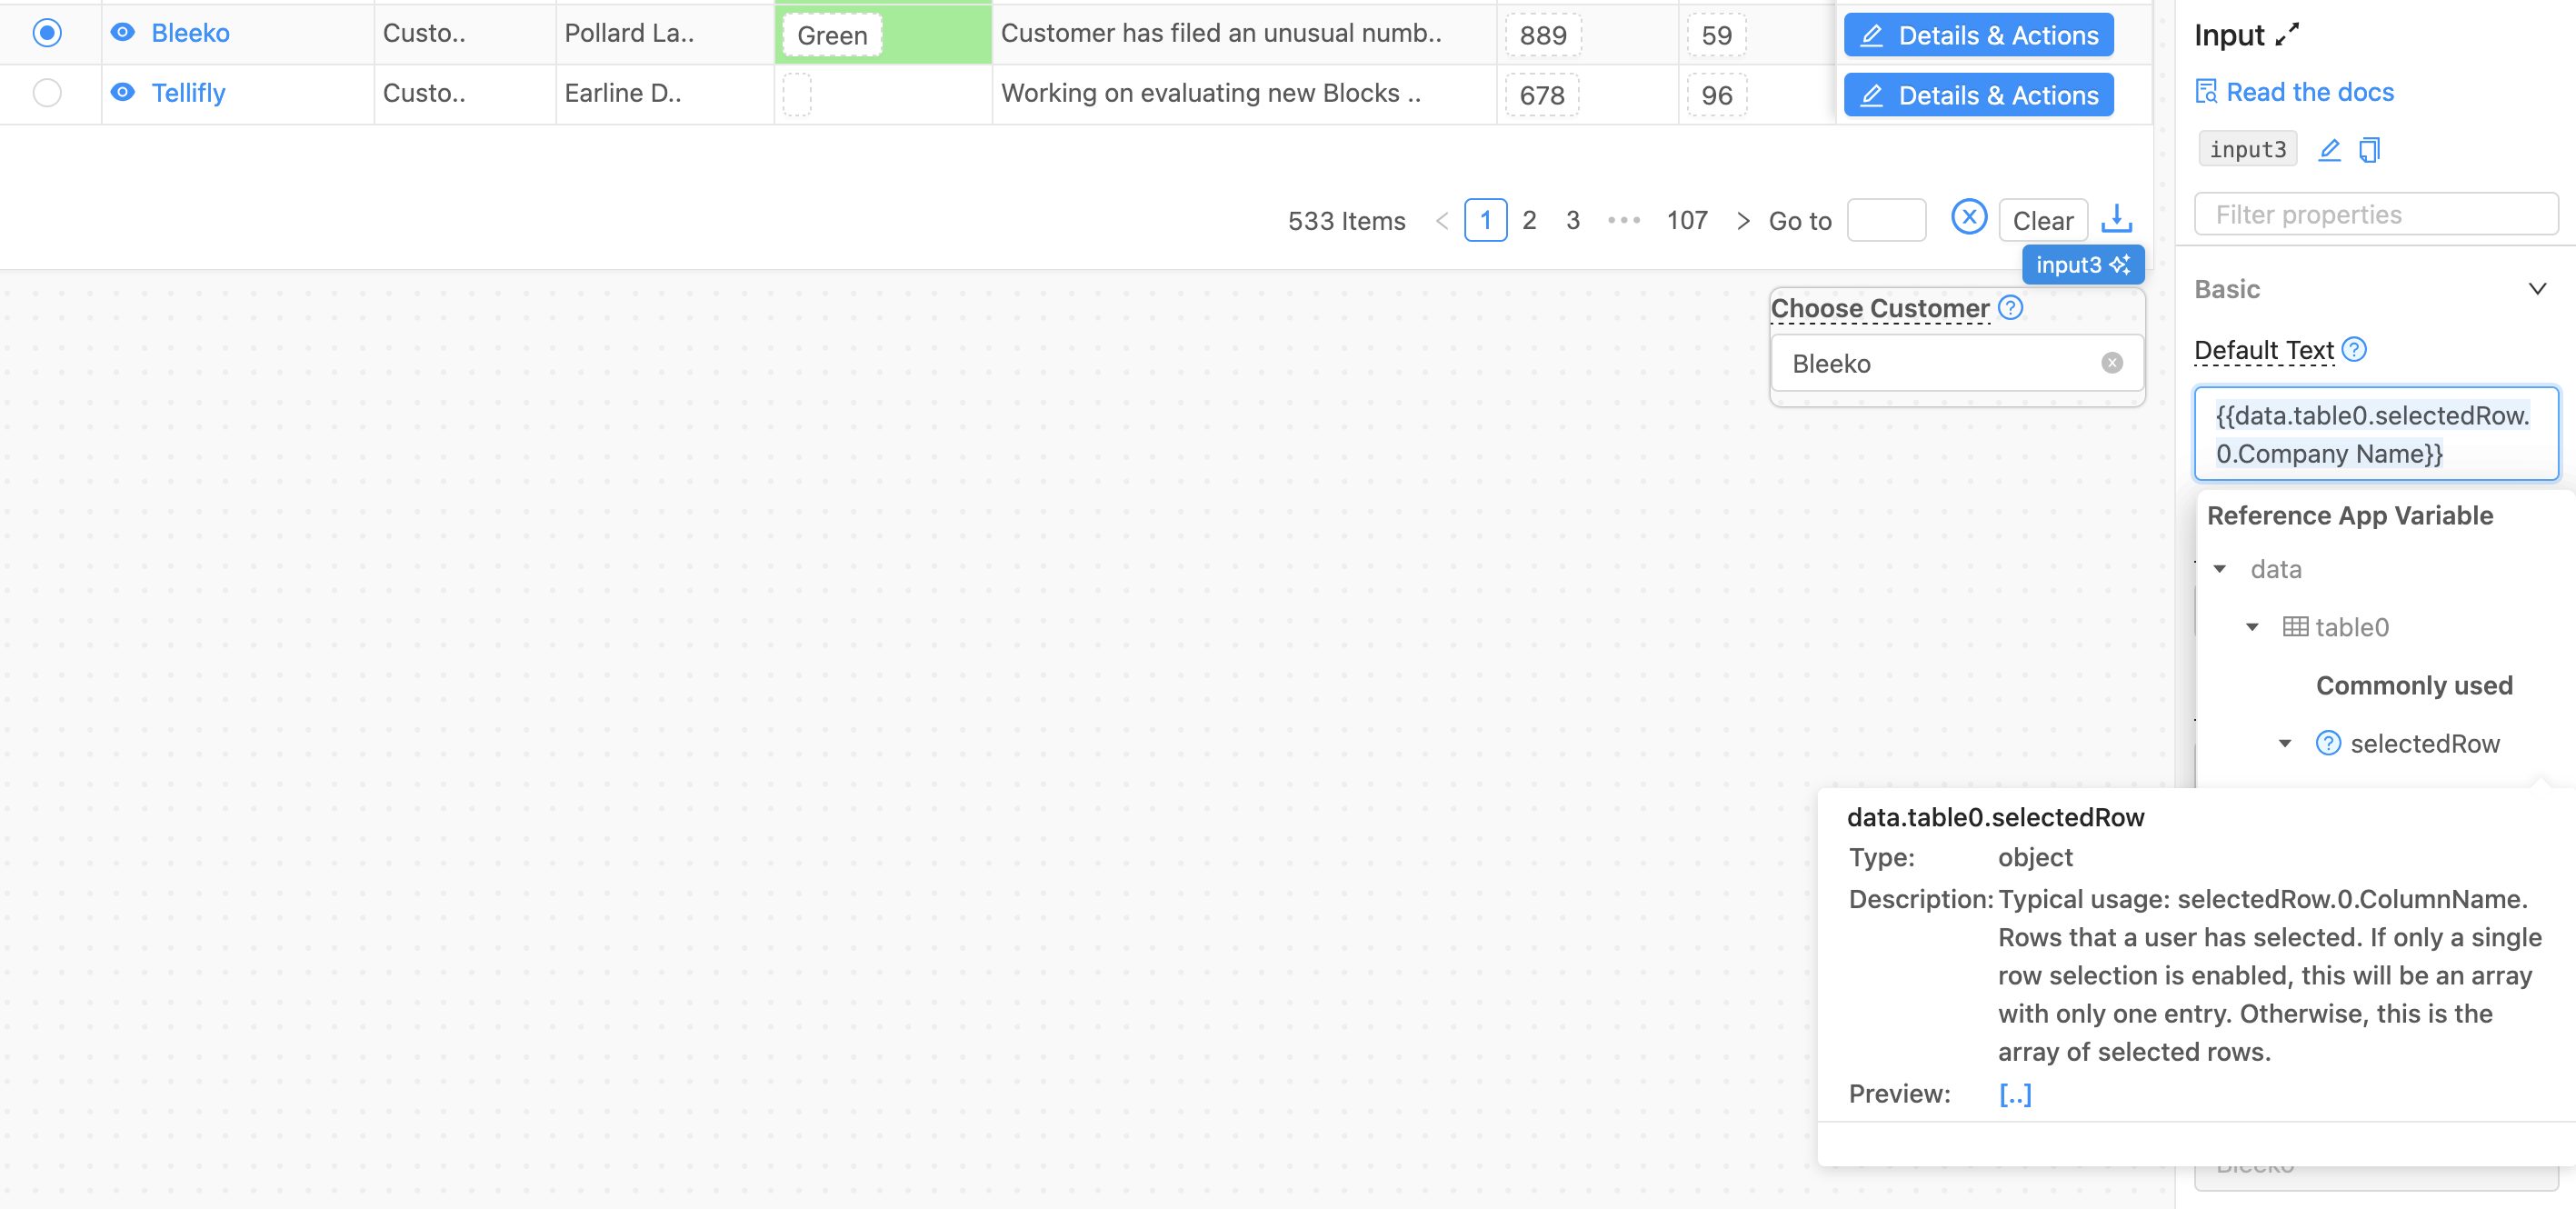
For example, if we want to edit the name corresponding to an account, set the Default Text property to {{data.table0.selectedRow.0.Name}}.
What are {{}} good for?All component properties are stored in a global key value store that other components in the app are able to access. You are able to reference other components using javascript dictionary terminology.
Based on Django's templated {{}} syntax, the special
{{}}expression allows you to substitute in values from one set of objects in your application to another. For example, for the Default Text property, we reference the selectedRow.0.First Name property of the table with identifier table0. As all frontend components are stored under the global data key, to reference this component, we would write{{data.table0.selectedRow.0.Name}}.
Then, make a query that references the selected row and the user input to write back to the database (if the table connects to a table). We'll trigger this query from a button!
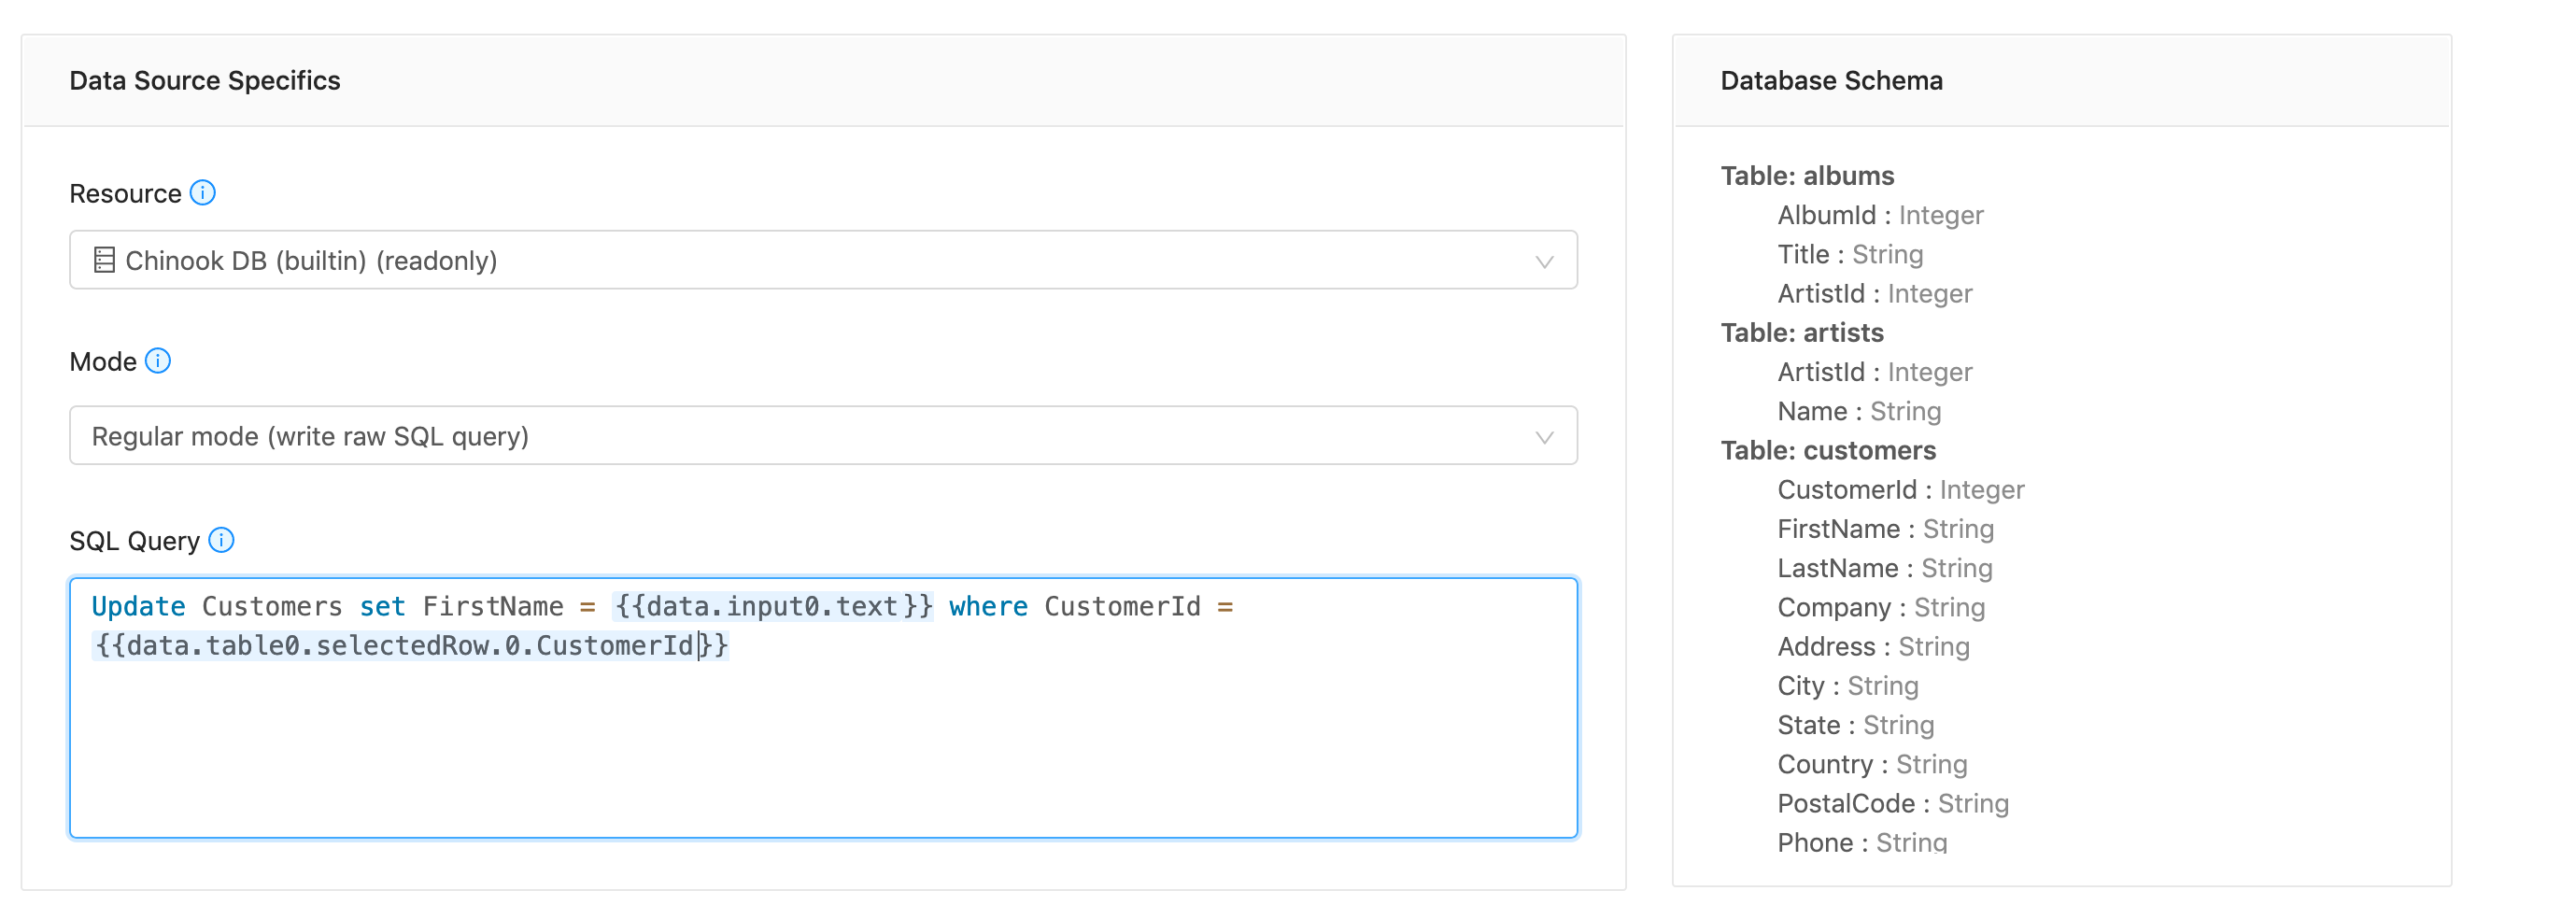
Now, you're able to reference both the selected row column (e.g. the CustomerId) and the new first name (from the input field) inside a query.

Last, drag a button and connect it to your query (e.g. sqlApi0) by updating the code property. For example, if your table loaded data from query sqlApi1 and the save query was sqlApi0, you would want to select the queries.sql0 and queries.sql1 queries.
That's it! Now, when you click on a new row in the table and type in a name, you're able to save the first name to the corresponding CustomerId by clicking Save Changes.
Hiding columns
To hide columns but still access them in the selectedRow property, click Edit columnProperties, type in the column name you'd like to hide, and set Component to hidden.
Making multiple rows editable at once (single and bulk updates)
To make multiple rows editable (advanced), click Edit columnProperties and type in the column names you'd like to enable edit access to. Set Editable to true.
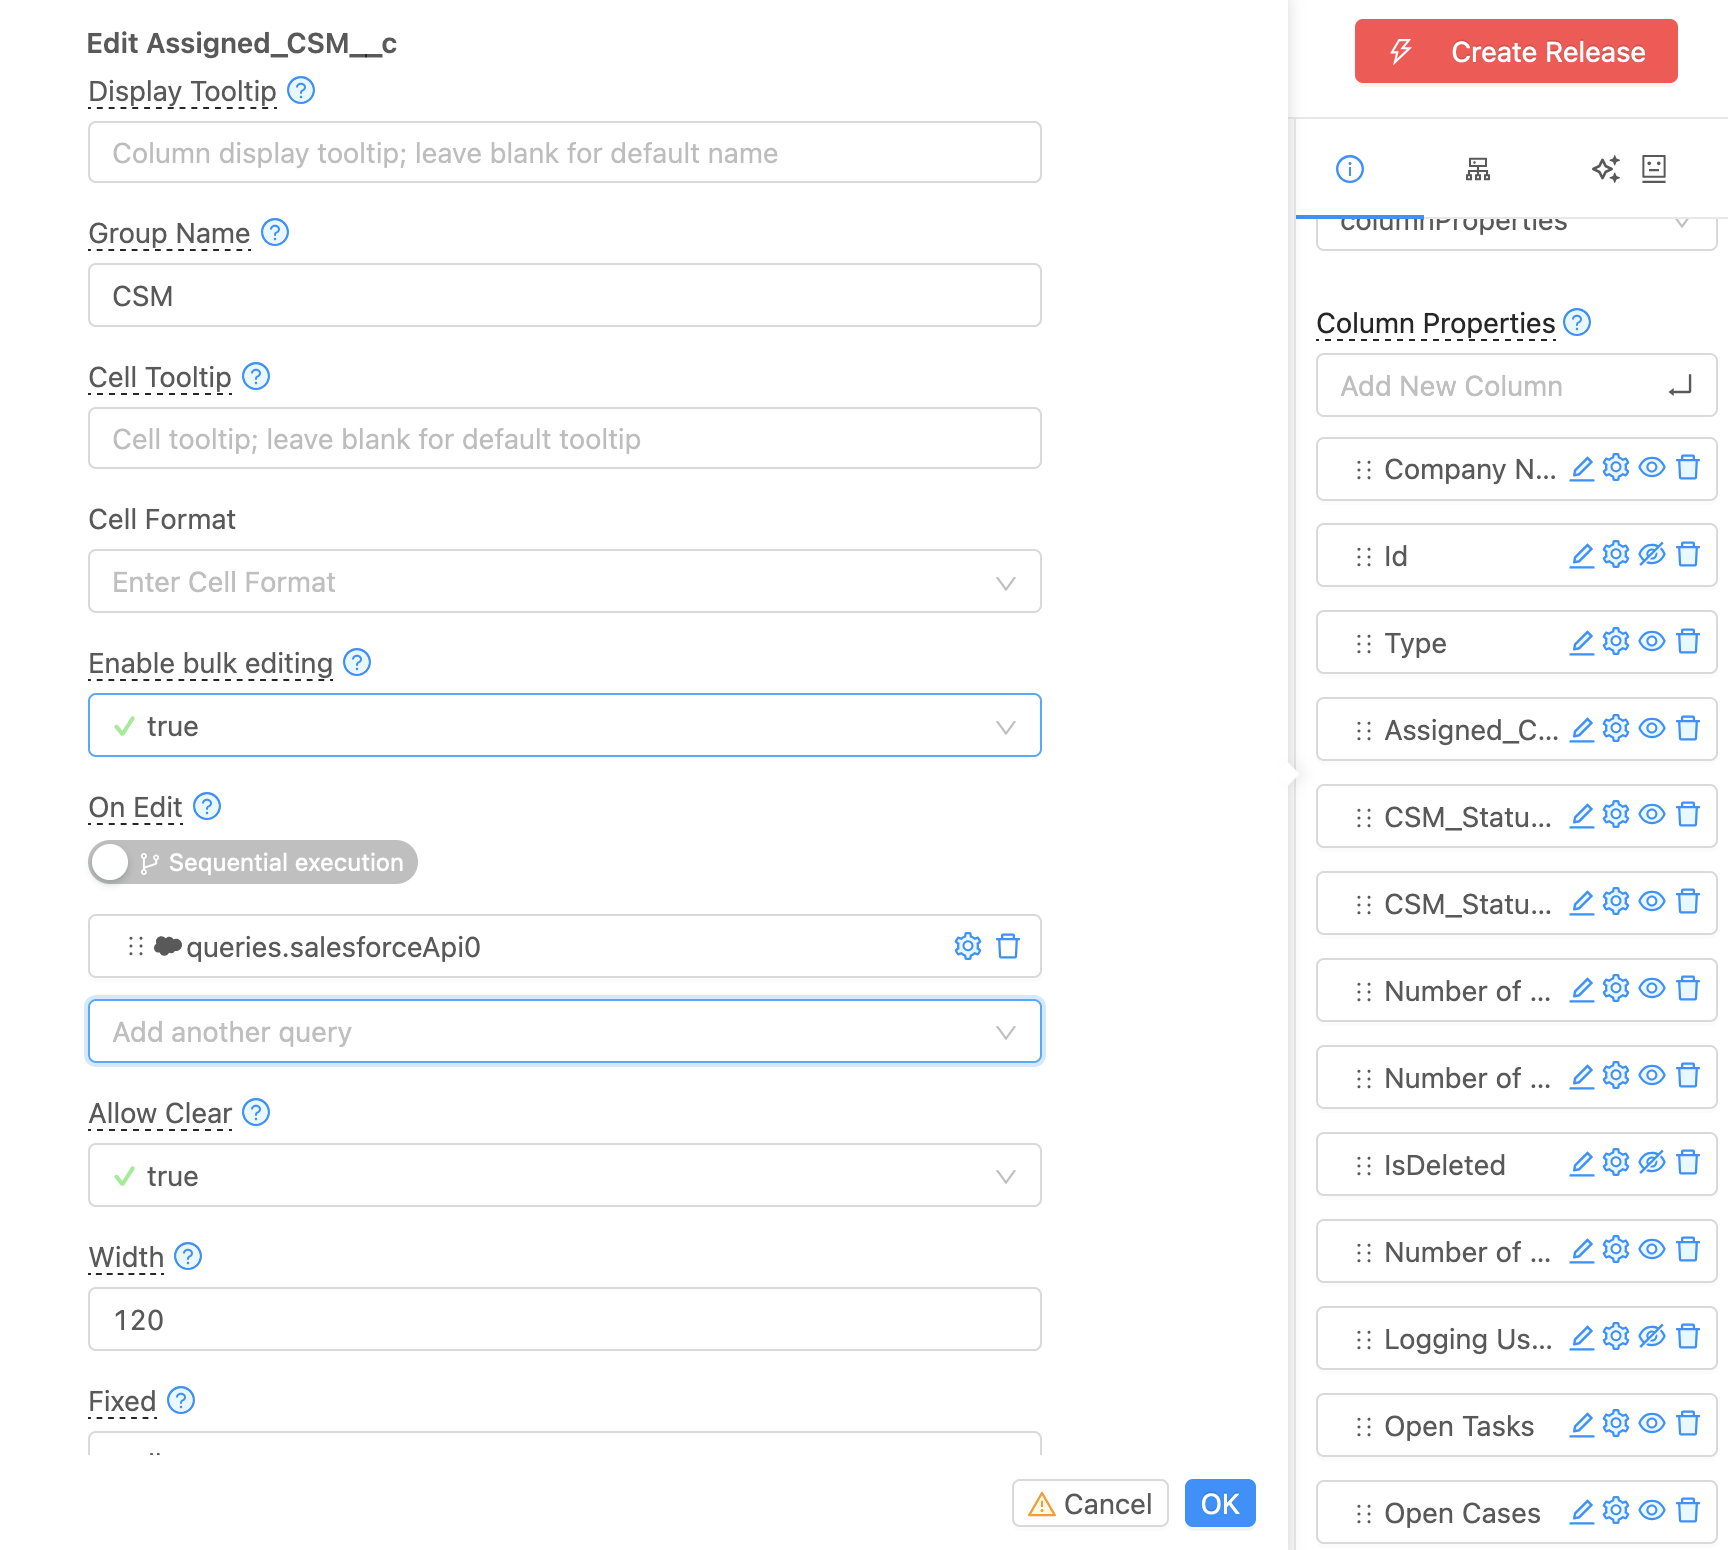
Whenever you make changes, they will be stored in the activeRow, activeColumn, activeIndex property for editing single rows. For editing rows in bulk, a modifiedRows table property and and a Save button will appear on the bottom right, that will trigger the saveCode code. Reference the modifiedRows property when creating a bulk query.
Editing single rows via event handlers
To edit rows via event handlers, reference the queries you'd like to trigger in the On Edit property of the column to reference the query.
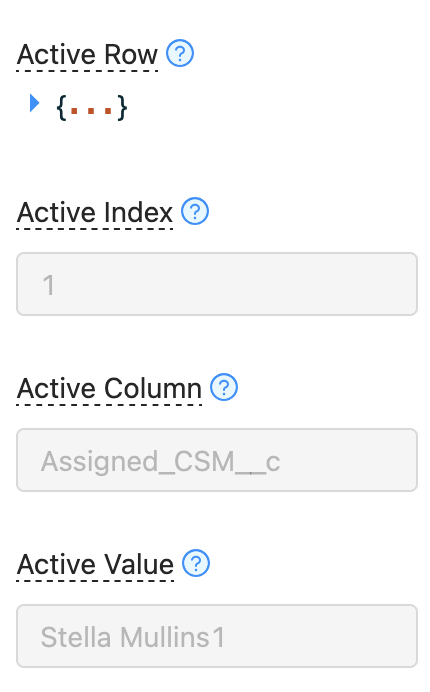

Within the query itself, reference the activeRow property to reference the edited row.
Editing bulk rows via the saveCode property
In the saveCode property, you're able to trigger the bulk query to run with the modified rows. See Triggering Queries & Analytics . Reference the modifiedRows property, which contains a dictionary of all modified rows.
Server Side Pagination
Oftentimes, you'd still like display your data, but you need to have server side pagination. To enable server side pagination, please click the mode property and select serverSidePagination.
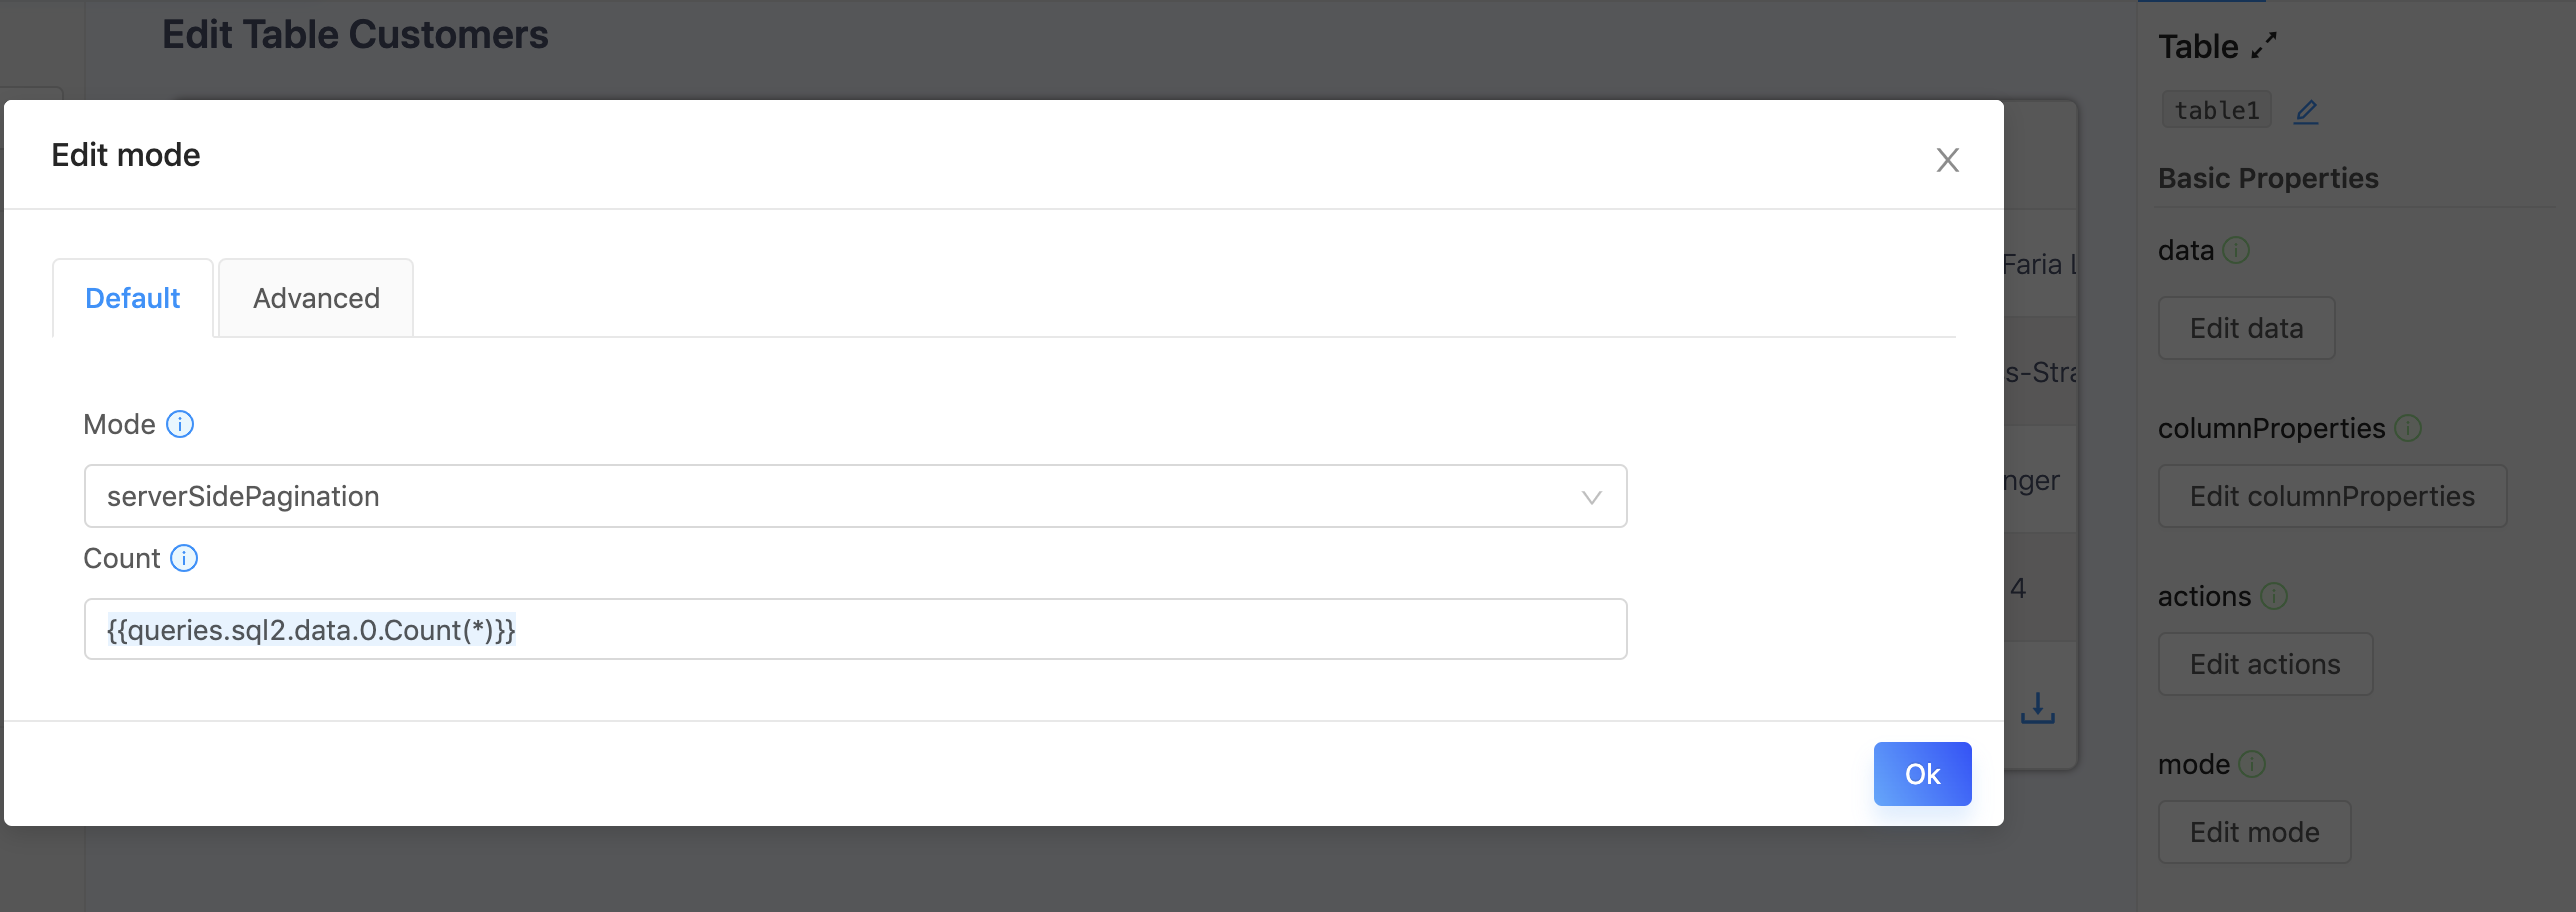
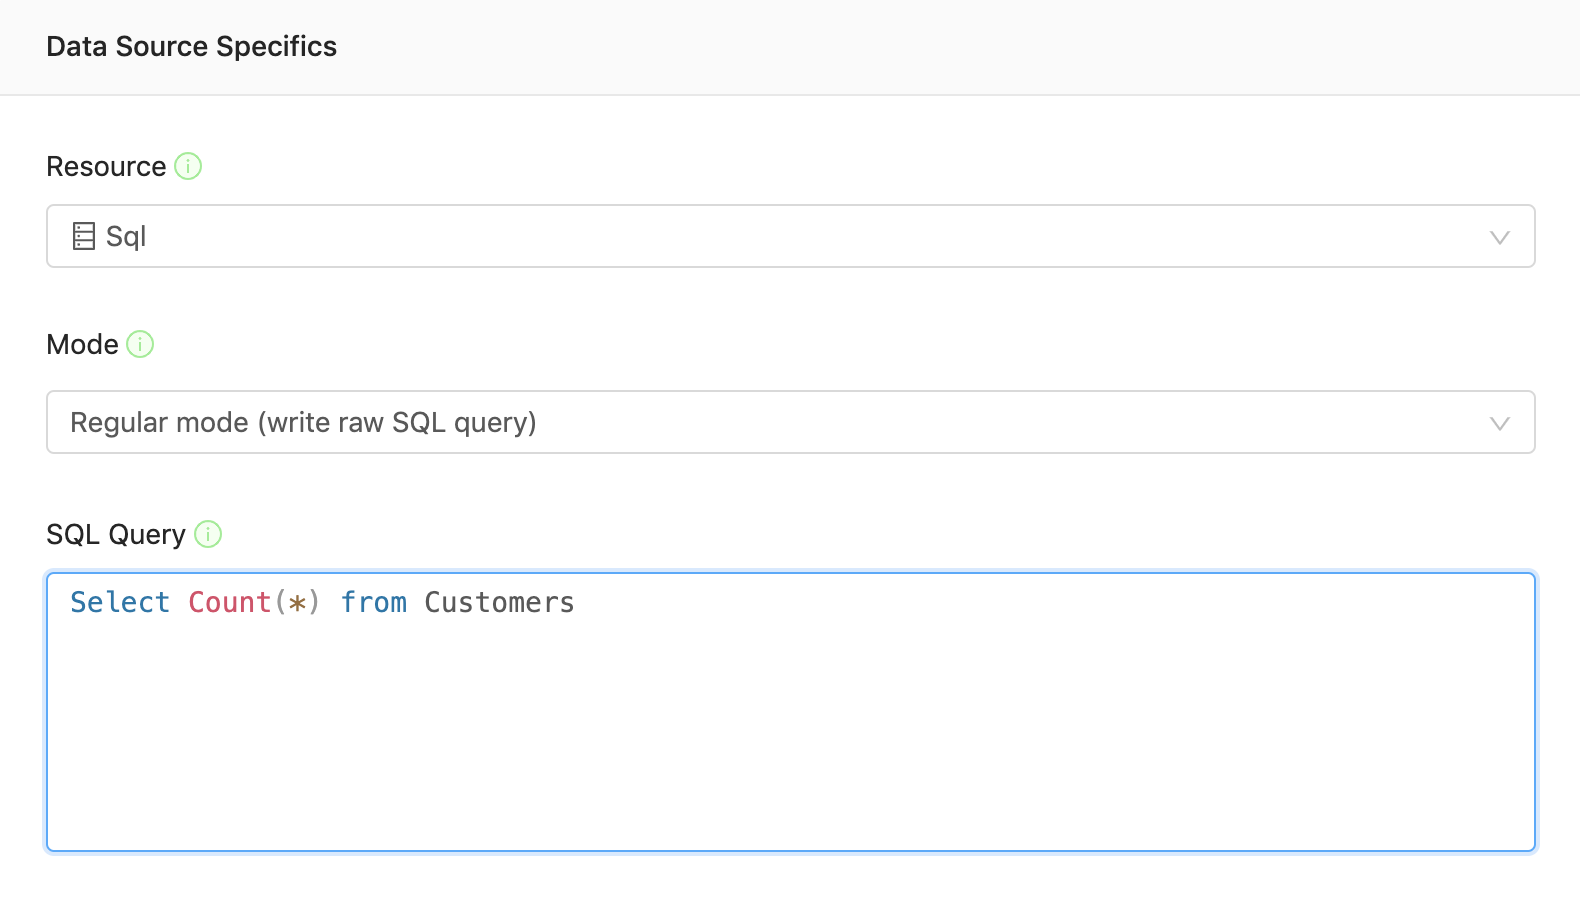
You need to specify the total number of rows in the table. For example, you're able to do this by the following SQL query (which is used in the count property above)
Finally, update the query used to load in the data with the pageSize and paginationOffset fields from the table, to have your paginated query.
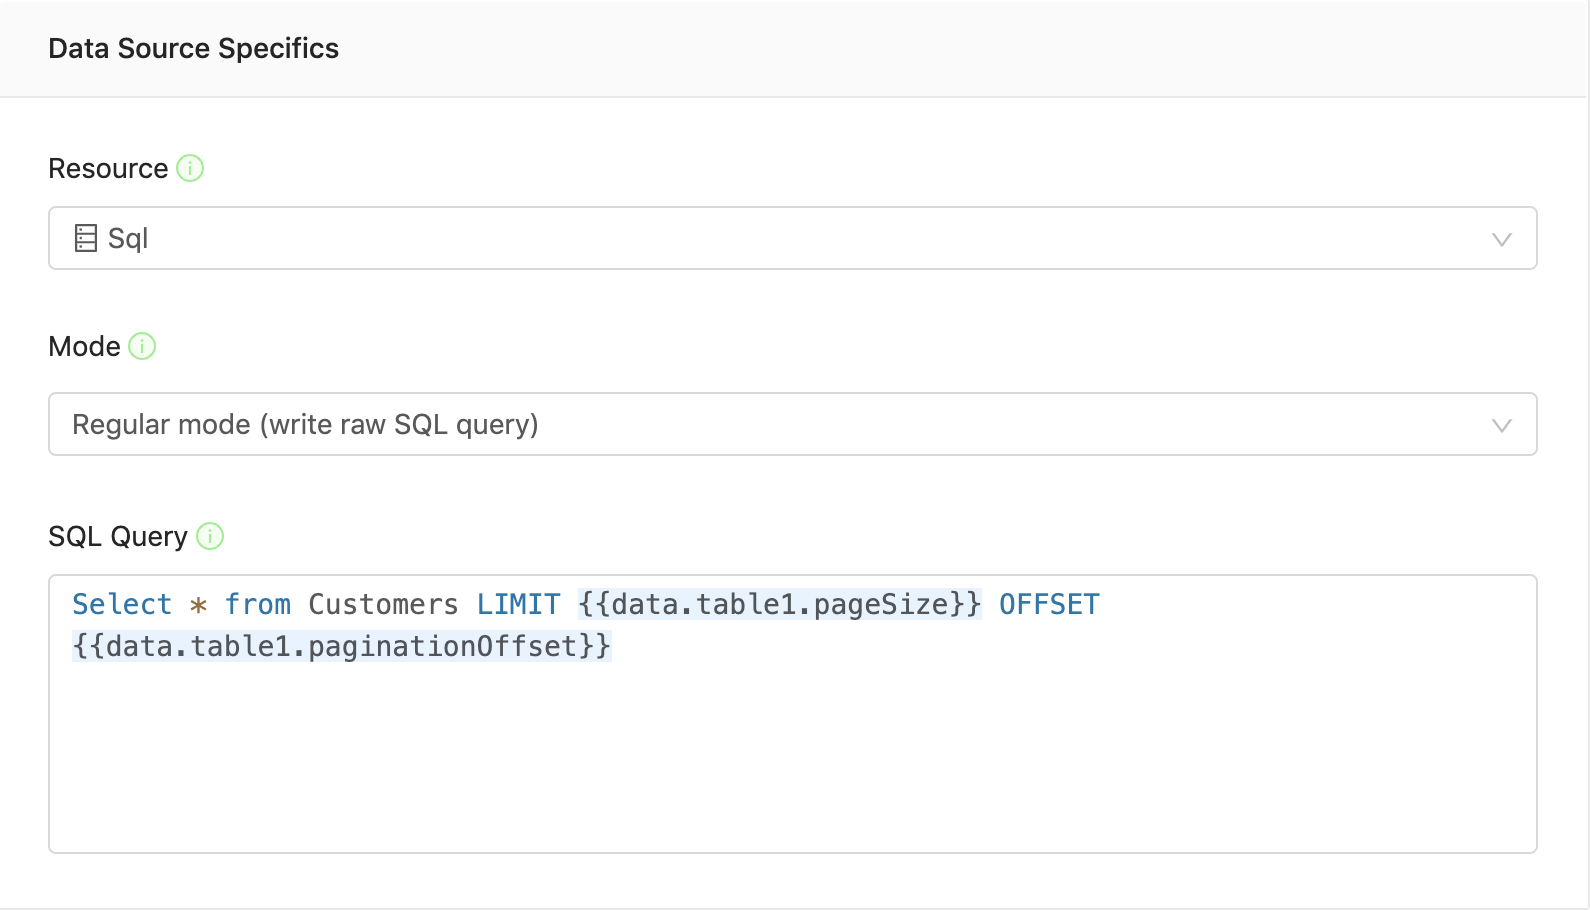
If you need to have server side filters and sort, the sorter and filters property of the table has the current selected filters and column which is being sorted, which you're able to plug into your SQL query or a transform.
Updated 8 months ago
