Quickbooks Authentication
Quickbooks natively supports Rest API endpoints via OAuth 2.0 (here's the full list), so we will use OAuth Authentication and a Rest API to access this resource.
When making a new Rest API query, click Create a New Rest API Resource.
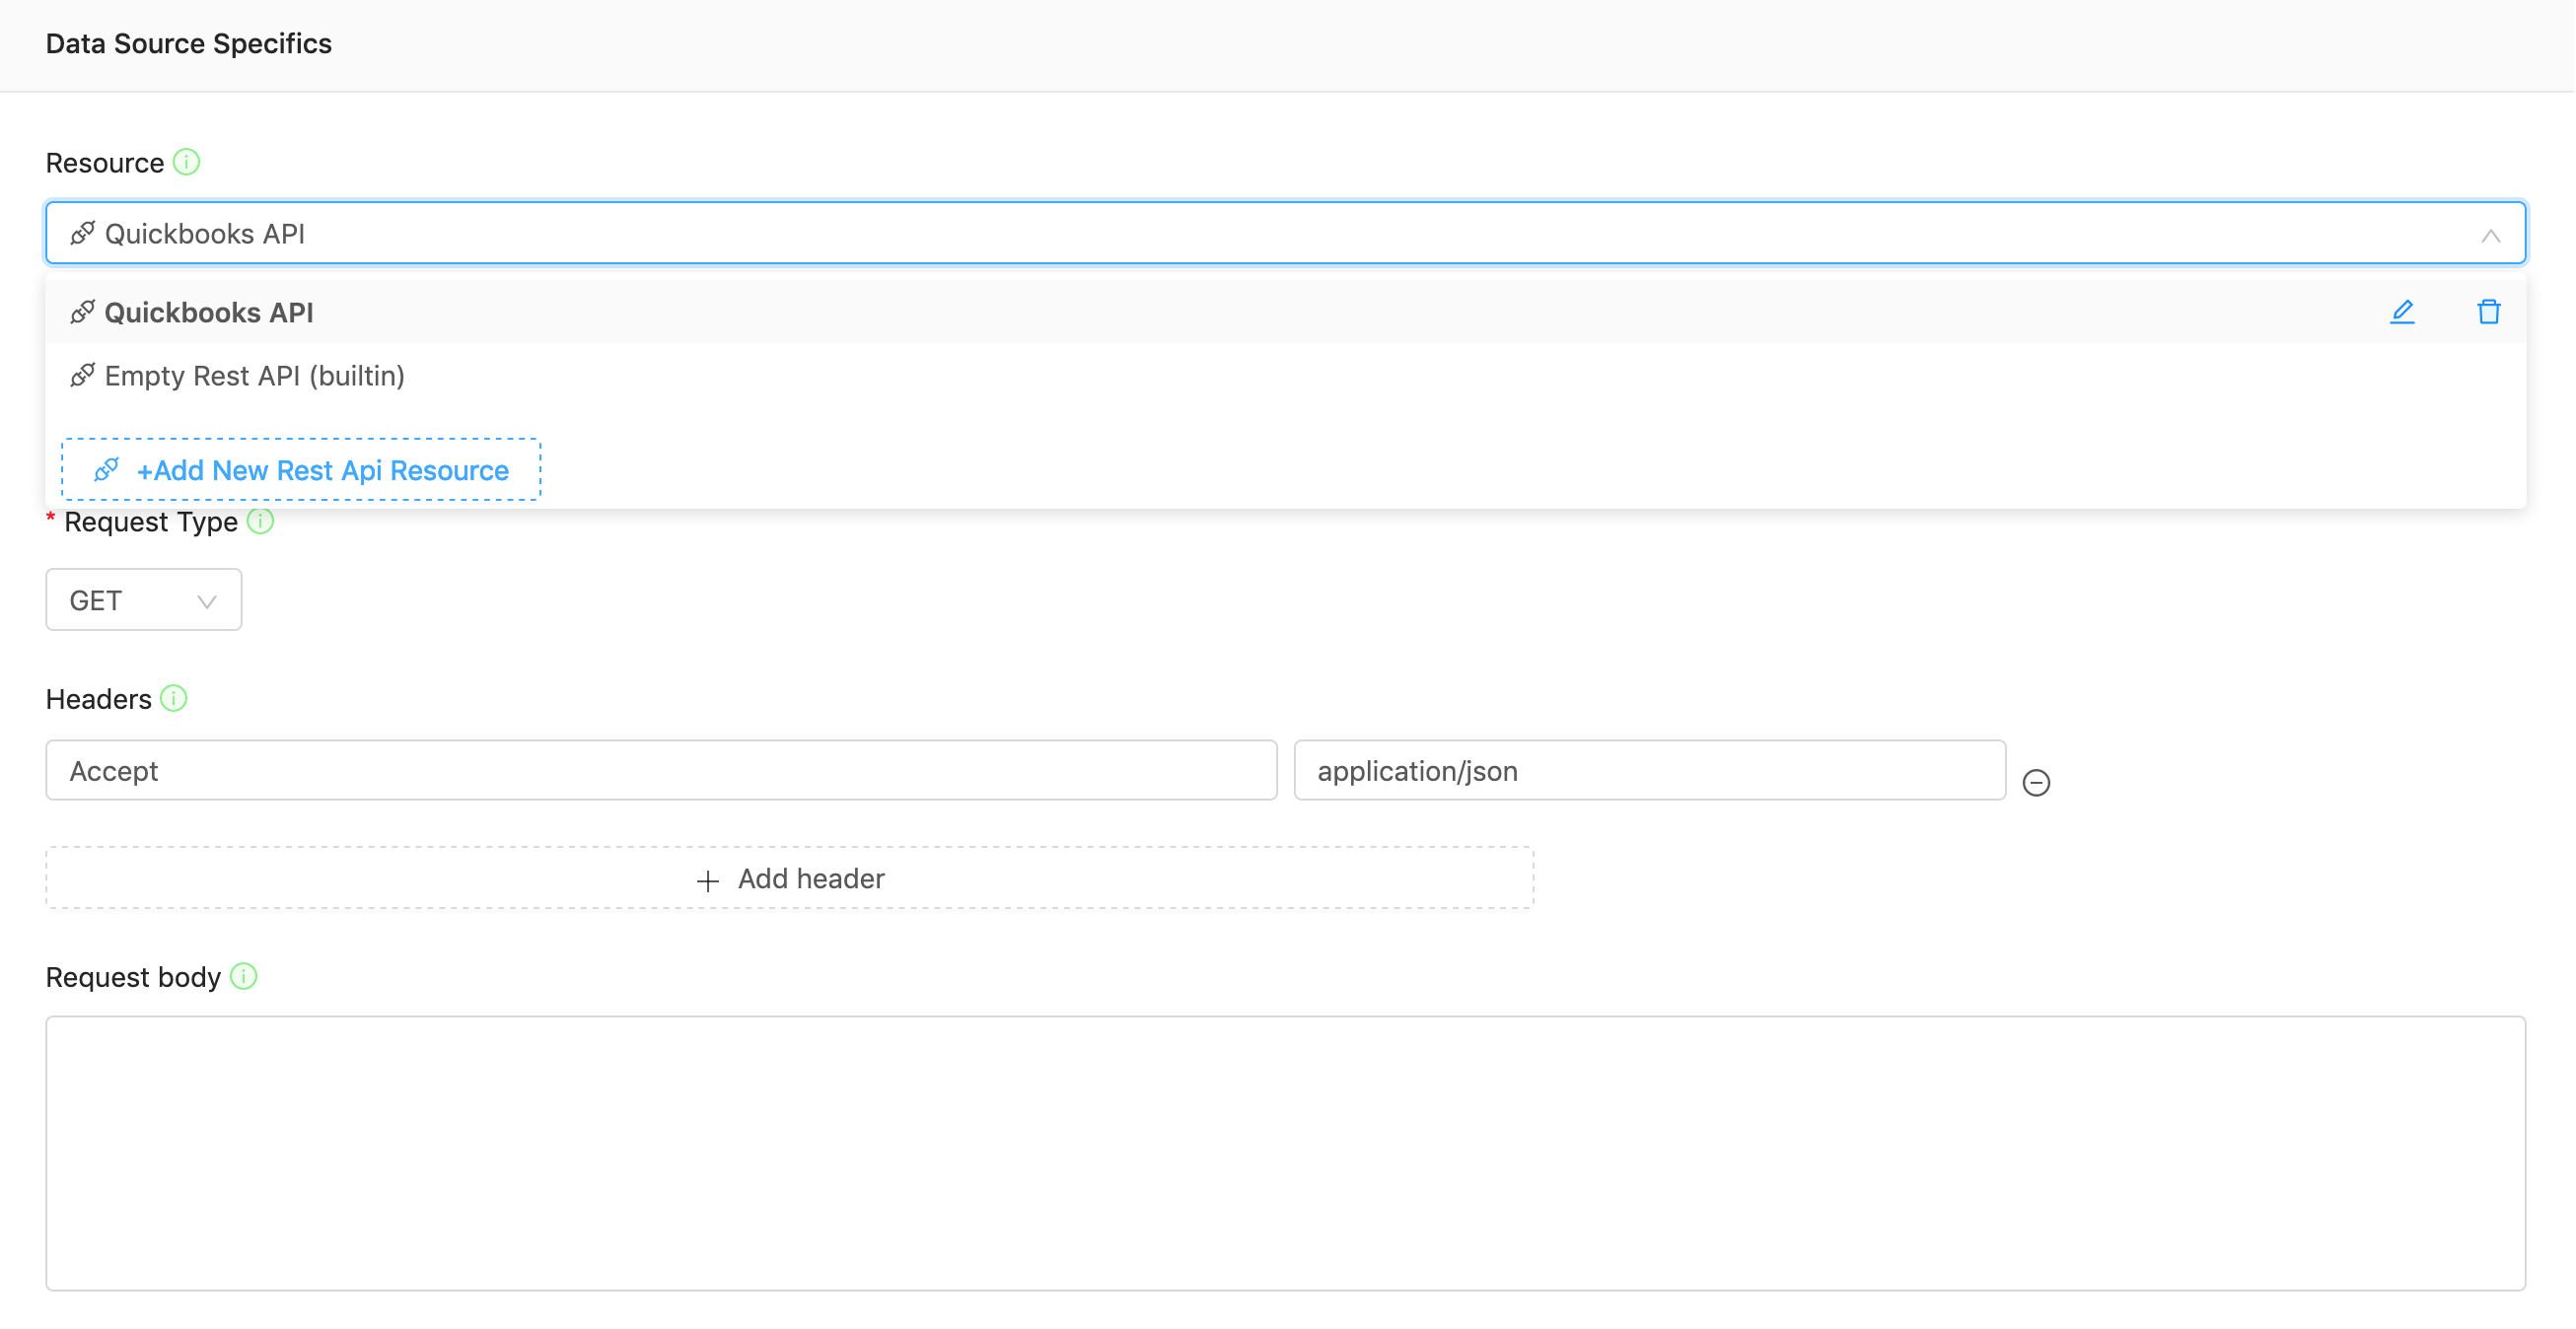
Next, set Authentication Method to OAuth and click Edit oAuth.
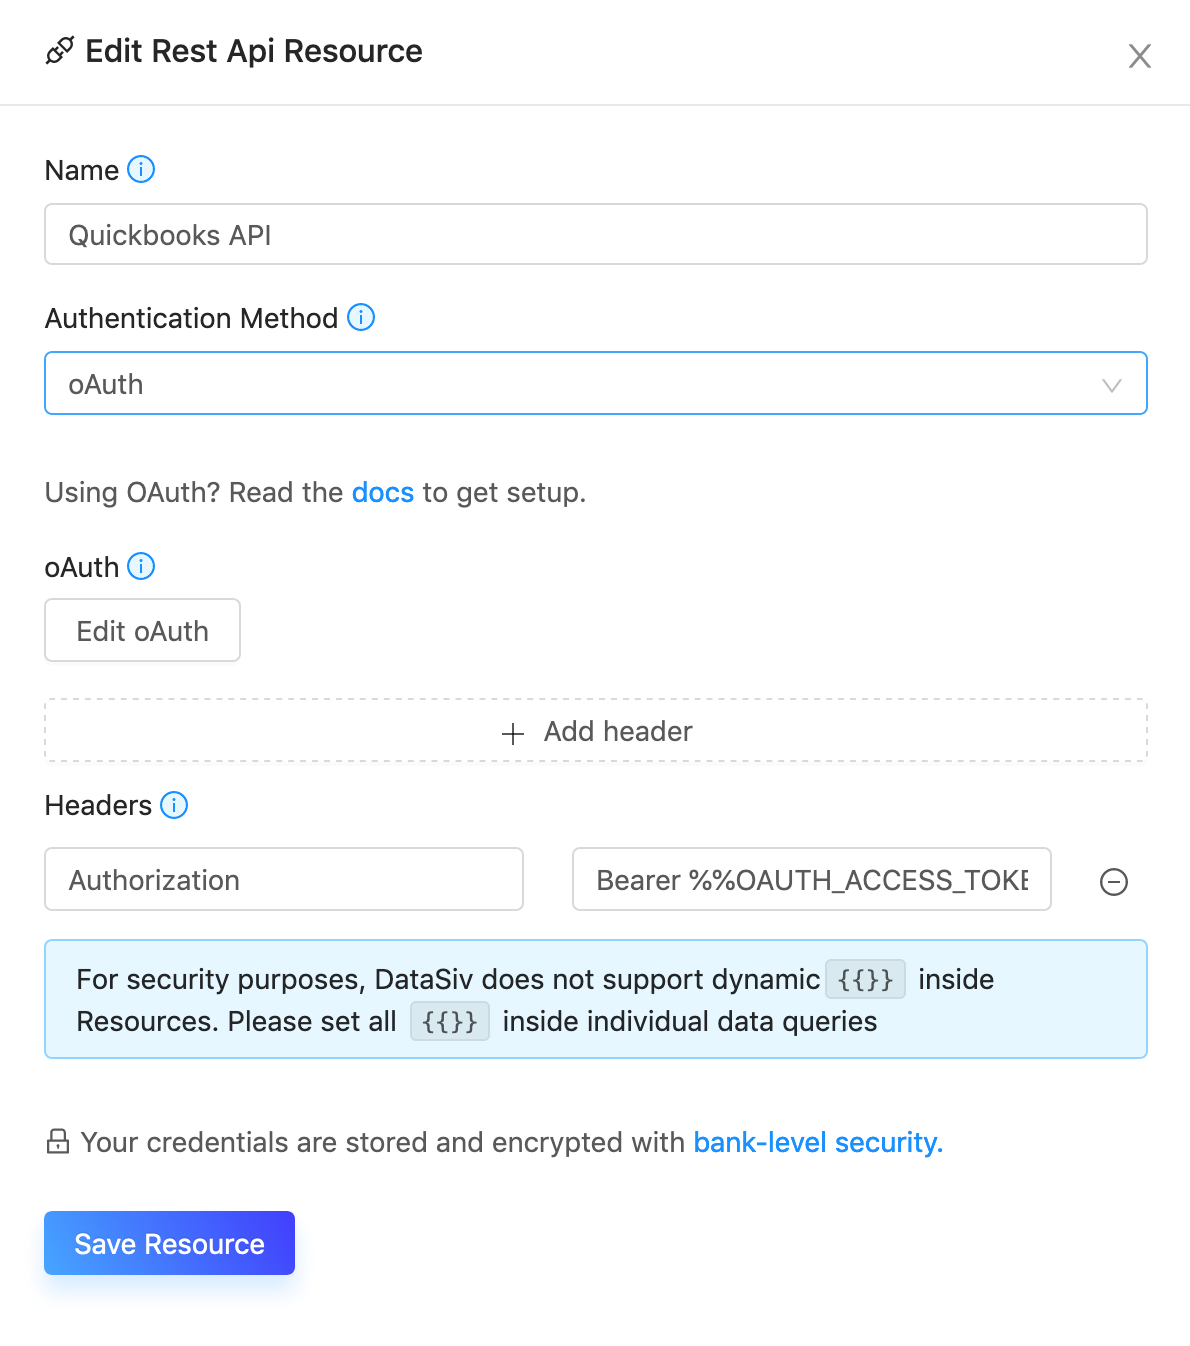
Set Authorize Url to https://appcenter.intuit.com/connect/oauth2 and Access Token Url to https://oauth.platform.intuit.com/oauth2/v1/tokens/bearer.
If you're using Quickbooks online, set the scope to com.intuit.quickbooks.accounting.
Make sure to set the redirect URI to https://www.datasiv.io/oauth_redirect/In the OAuth app, the redirect URI must go to https://www.datasiv.io/oauth_redirect/
Get the Client Id and Client Secret by going to https://developer.intuit.com/app/developer/dashboard .
Finally, click Verify OAuth Flow (required).
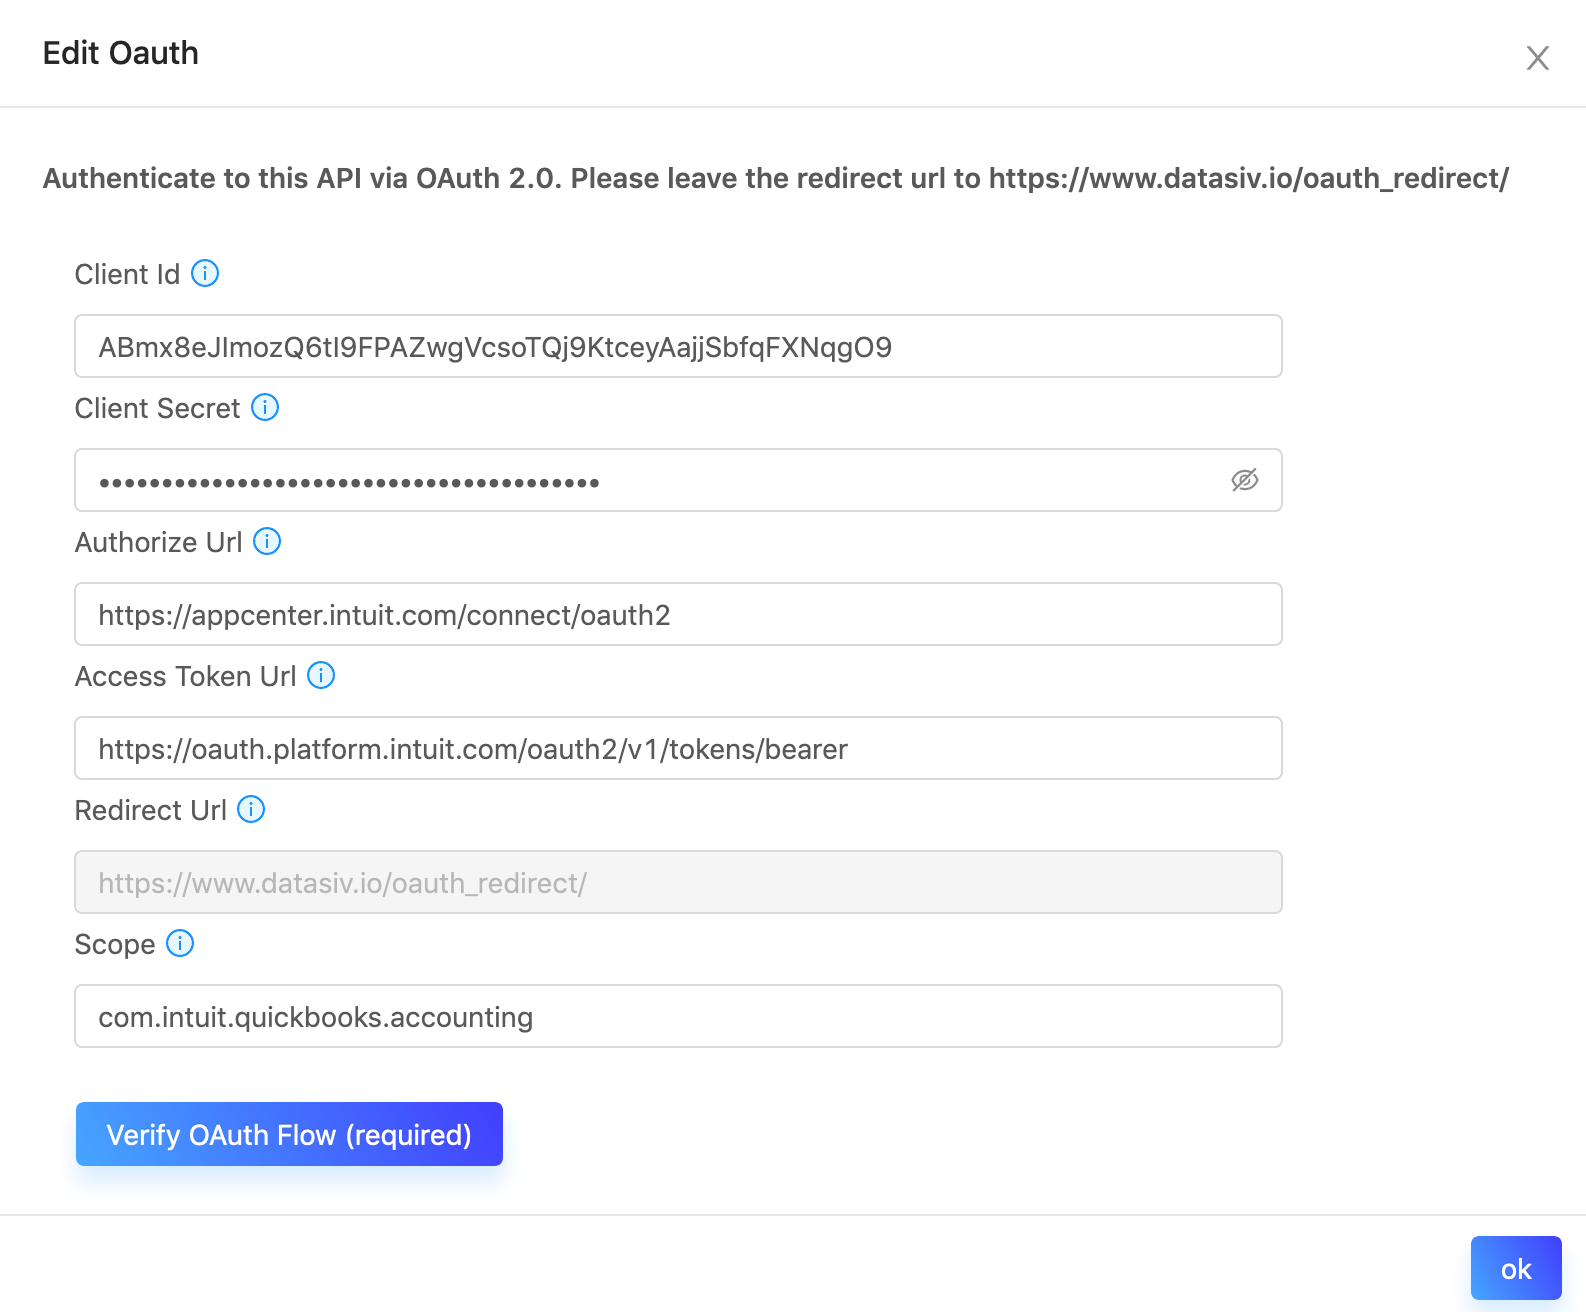
Going back to the Add Rest Api Resource model, under headers, add a new header with key Authorization and value Bearer %%OAUTH_ACCESS_TOKEN%%.
Click save.
Set an additional "Accept" header to application/jsonAs Intuit returns XML values by default, please set the Accept header to application/json.
Congratulations! You're now able to issue Rest API calls against all of the Intuit resources.
See the API explorer at https://developer.intuit.com/app/developer/qbo/docs/api/accounting/most-commonly-used/account for a full list of methods.
To find your specific company ID, please go to [https://quickbooks.intuit.com/learn-support/en-us/help-article/customer-company-settings/find-quickbooks-online-company-id/L7lp8O9yU_US_en_US][https://quickbooks.intuit.com/learn-support/en-us/help-article/customer-company-settings/find-quickbooks-online-company-id/L7lp8O9yU_US_en_US].
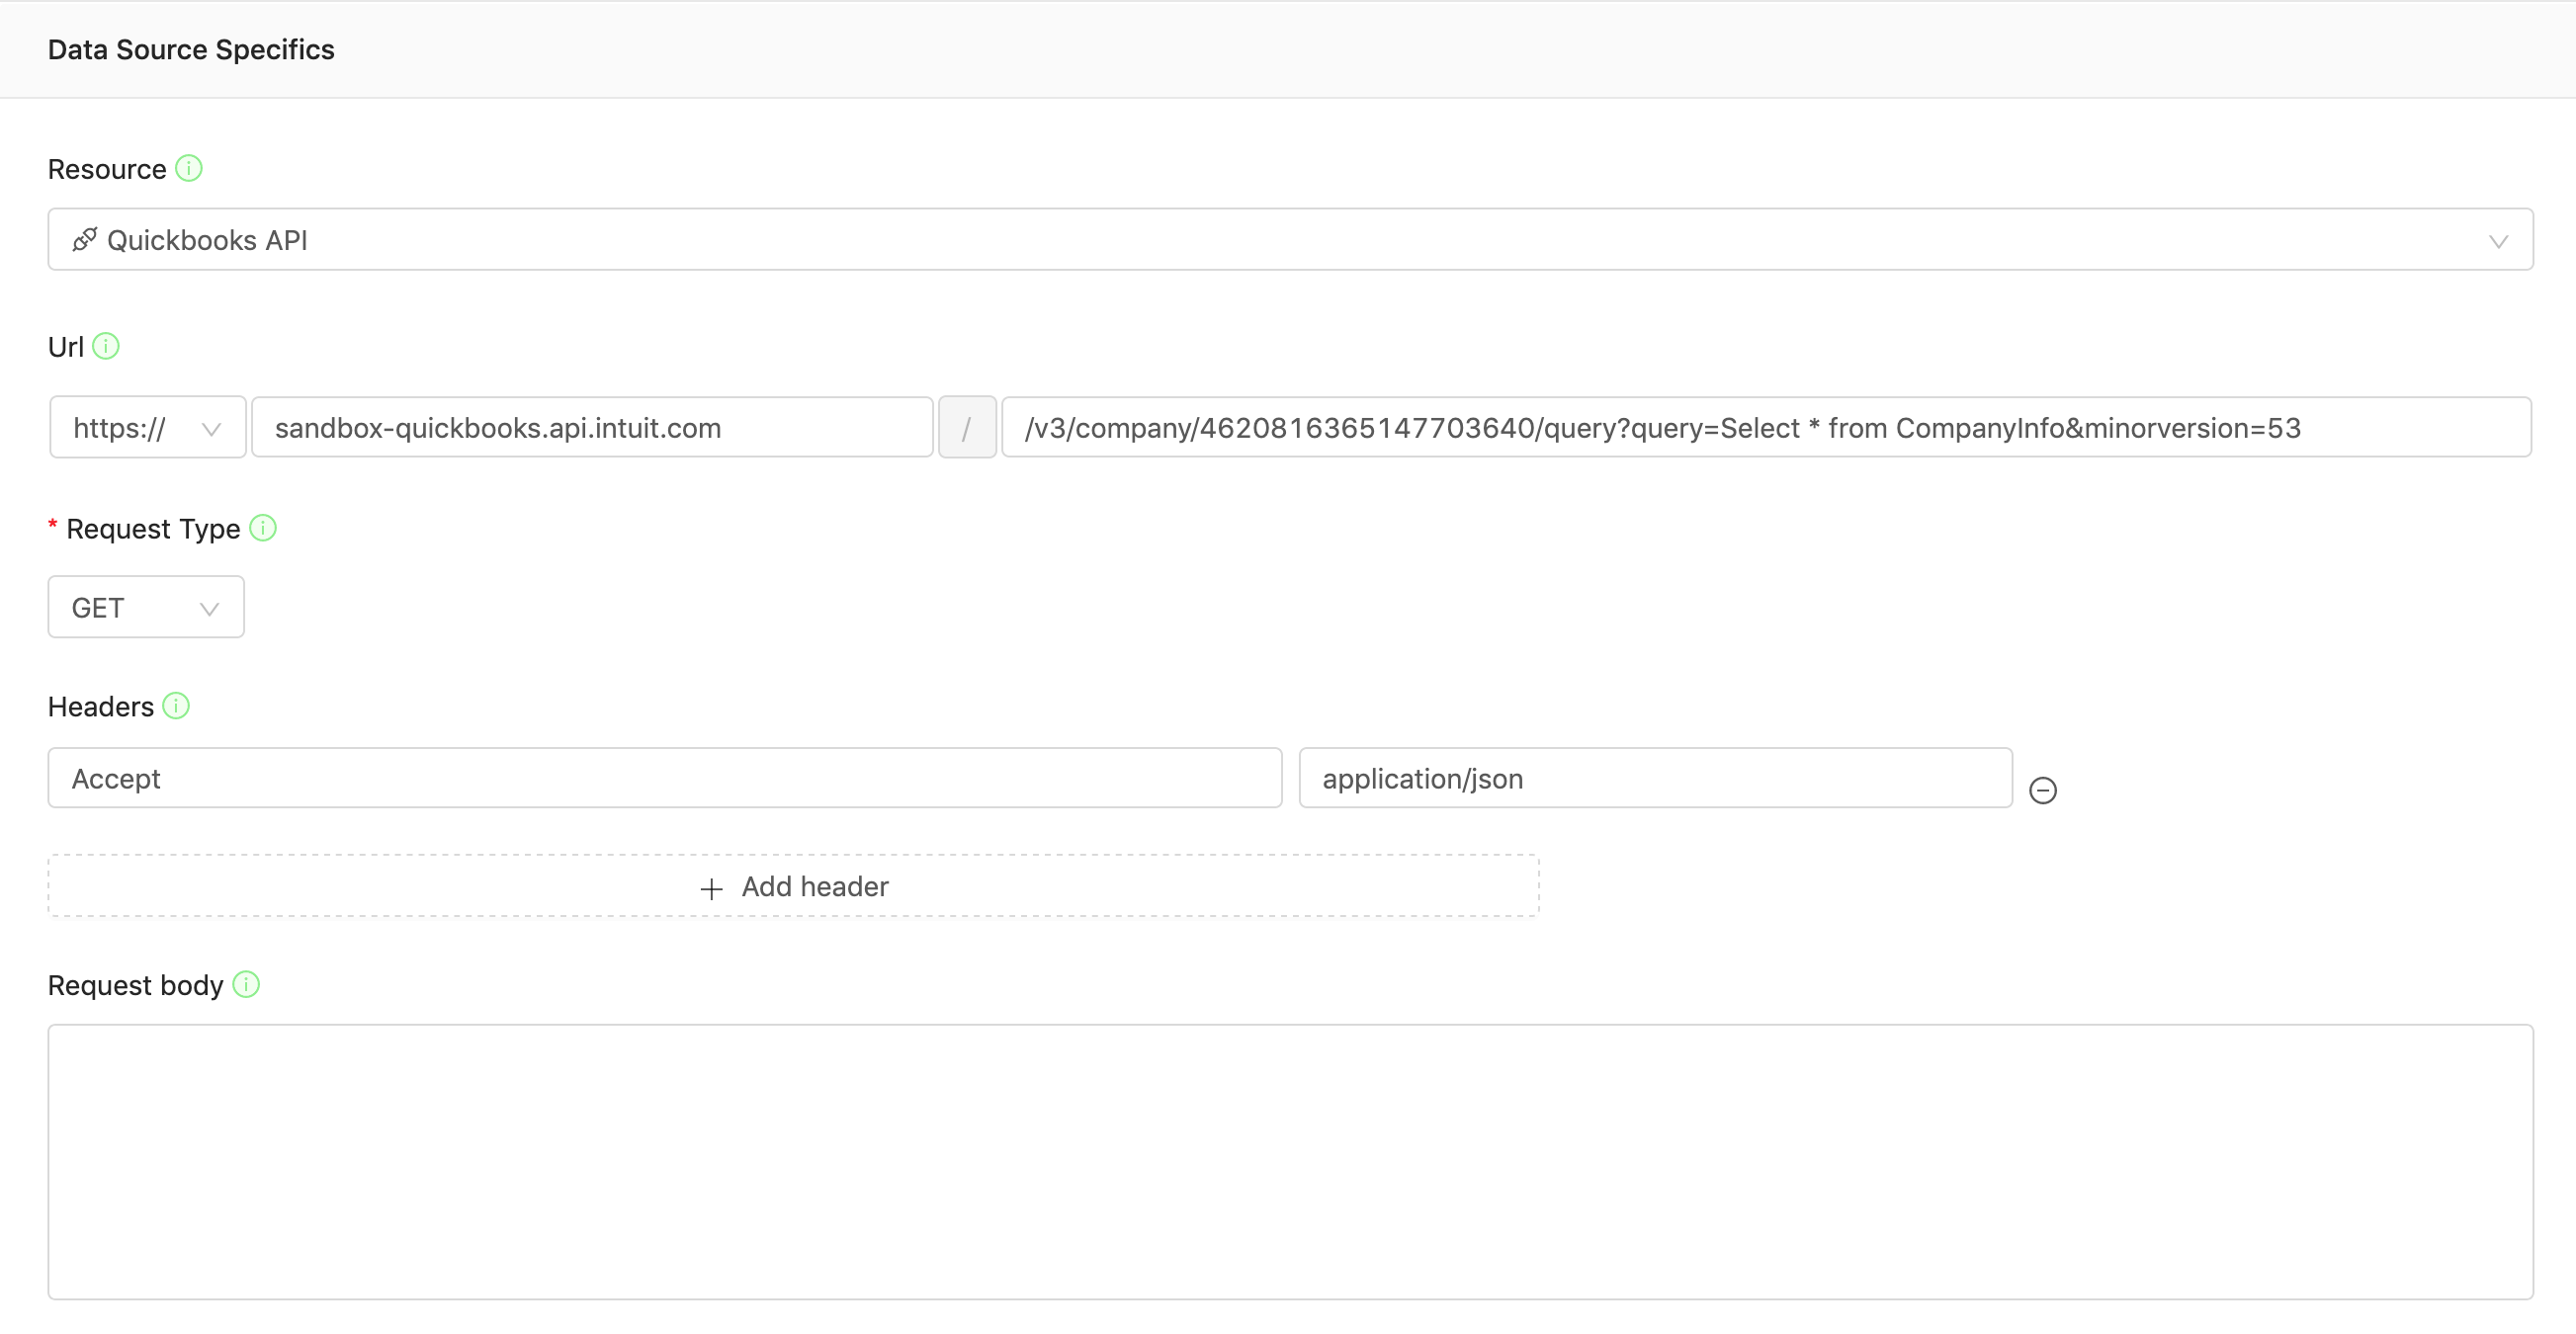
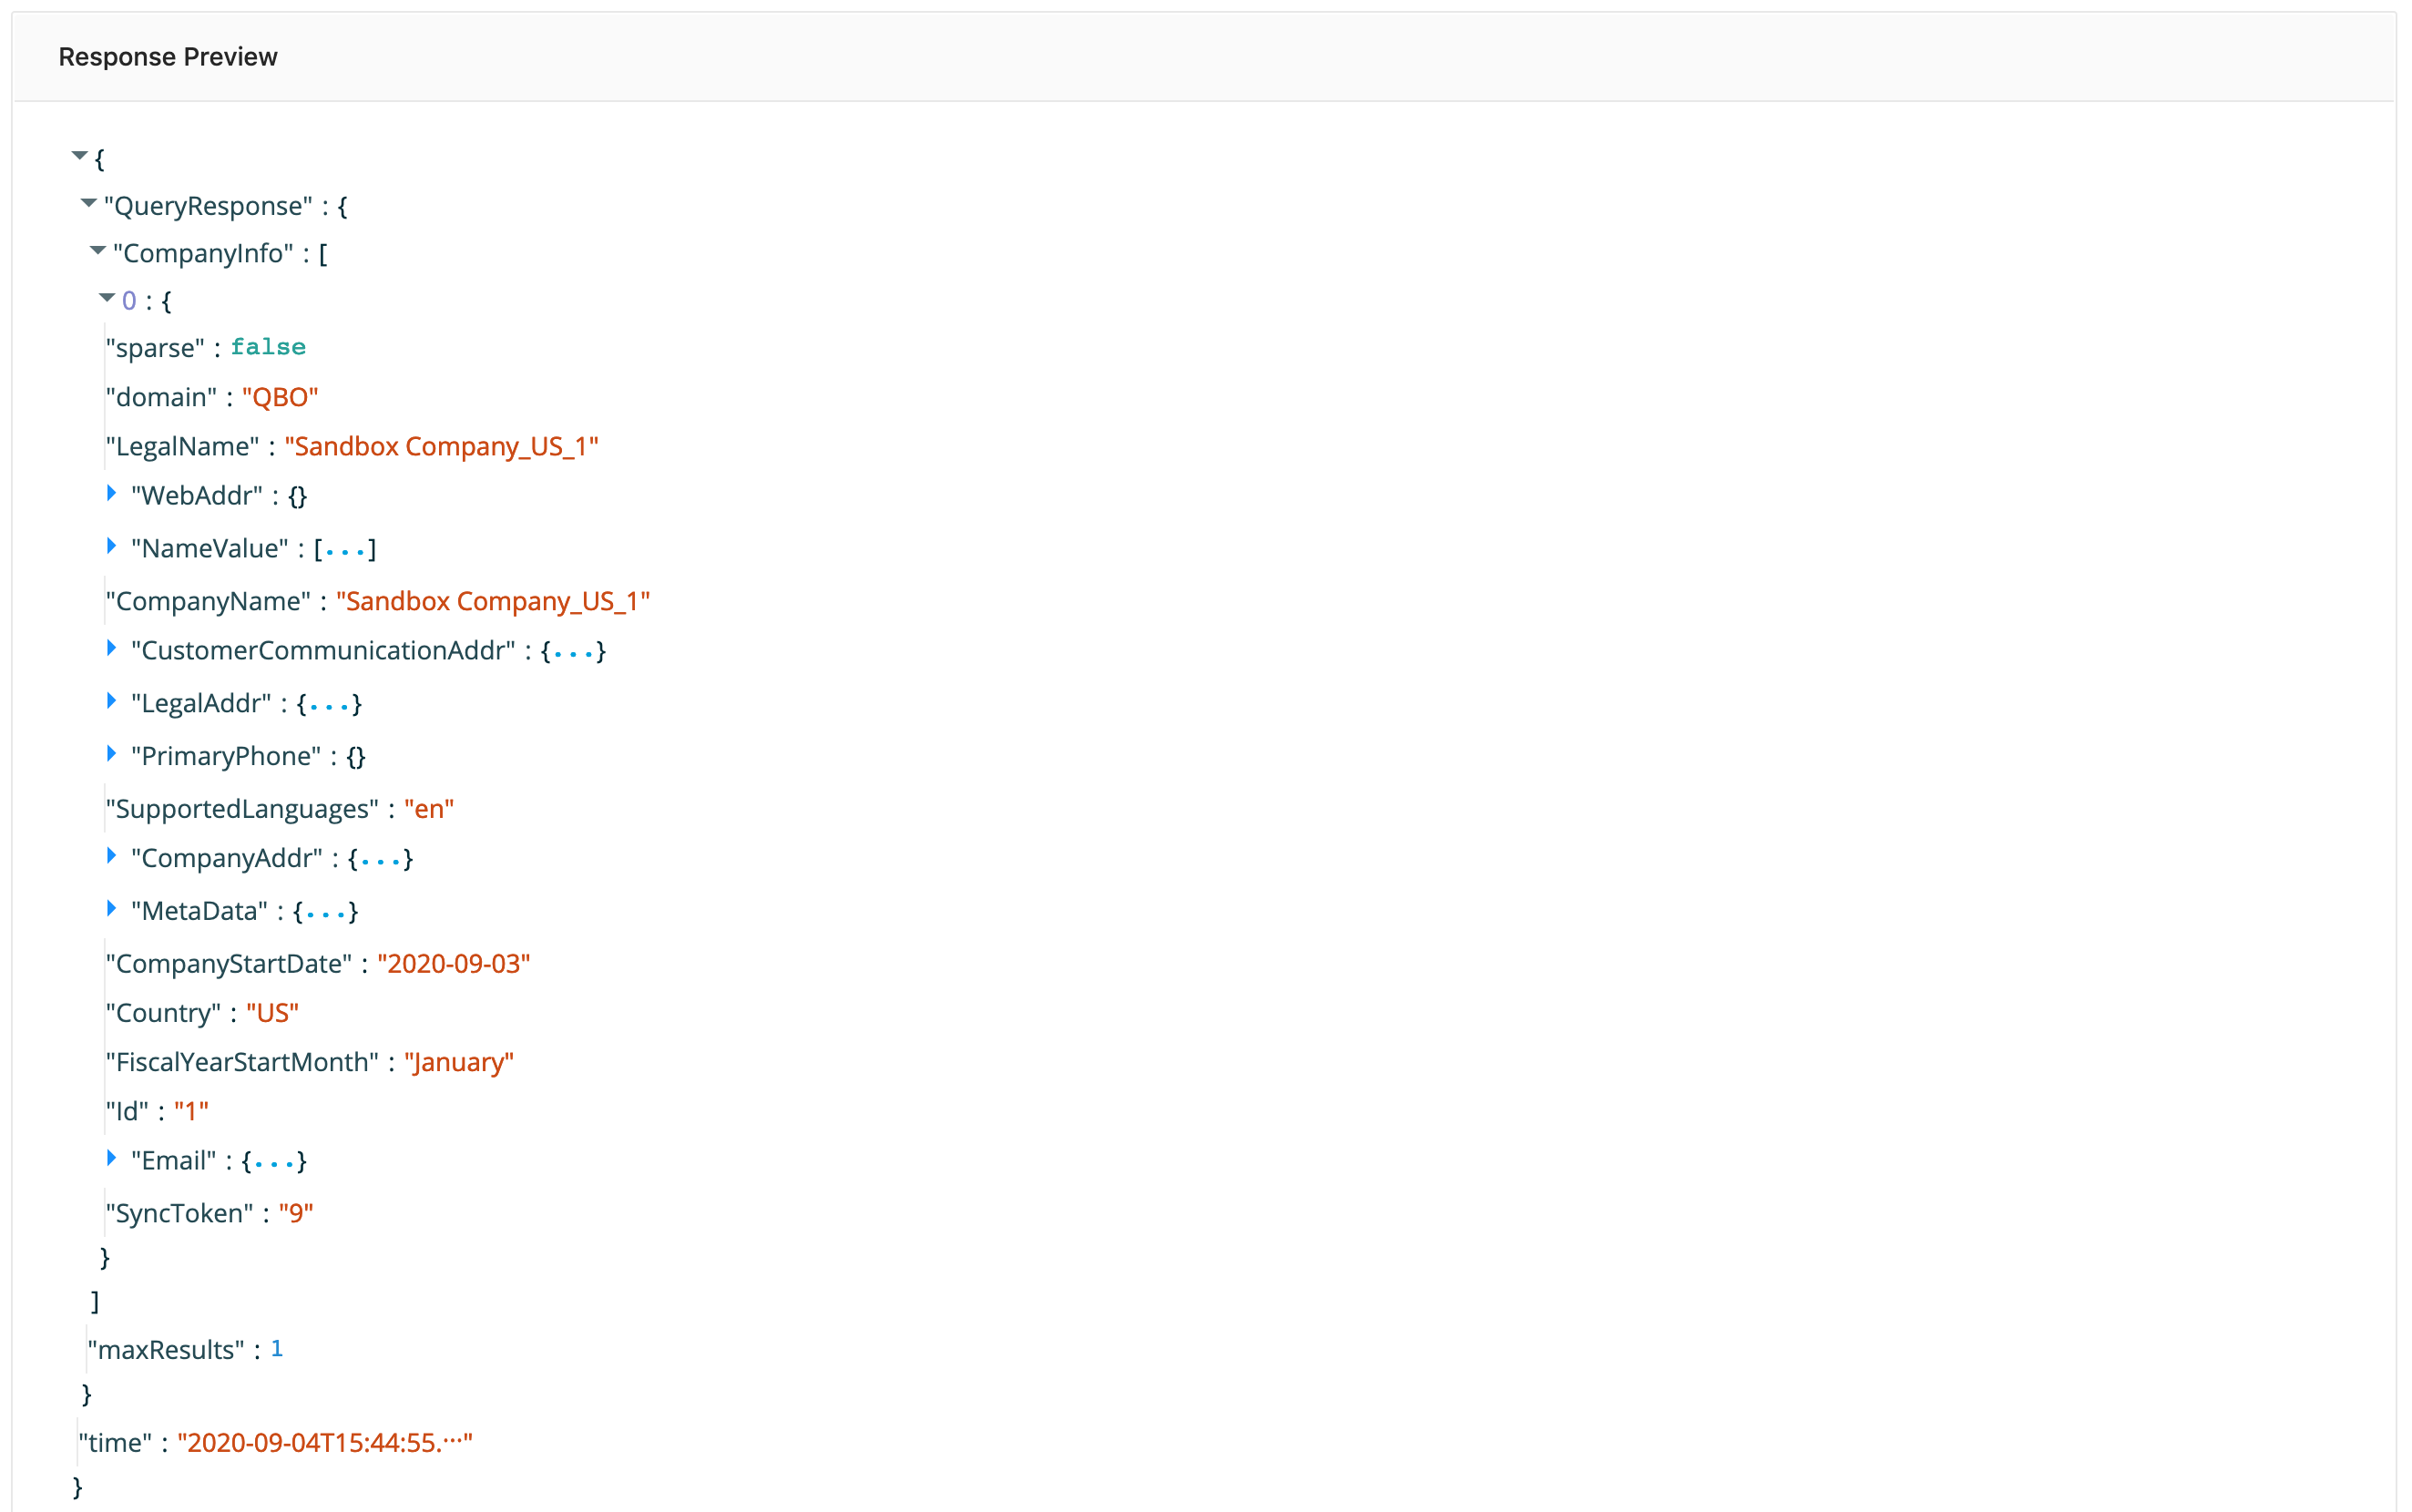
For example, a response from the company query endpoint can be found below:
Updated 9 months ago
