Rest API Authentication
DataSiv enables you to connect to arbitrary Rest API endpoints.
For a live example on how to integrate a Rest API into a sample application, please see the Flipping Feature Flags tutorial.
Currently, you can authenticate to Rest API endpoints by setting the headers manually, or using OAuth 2.0.
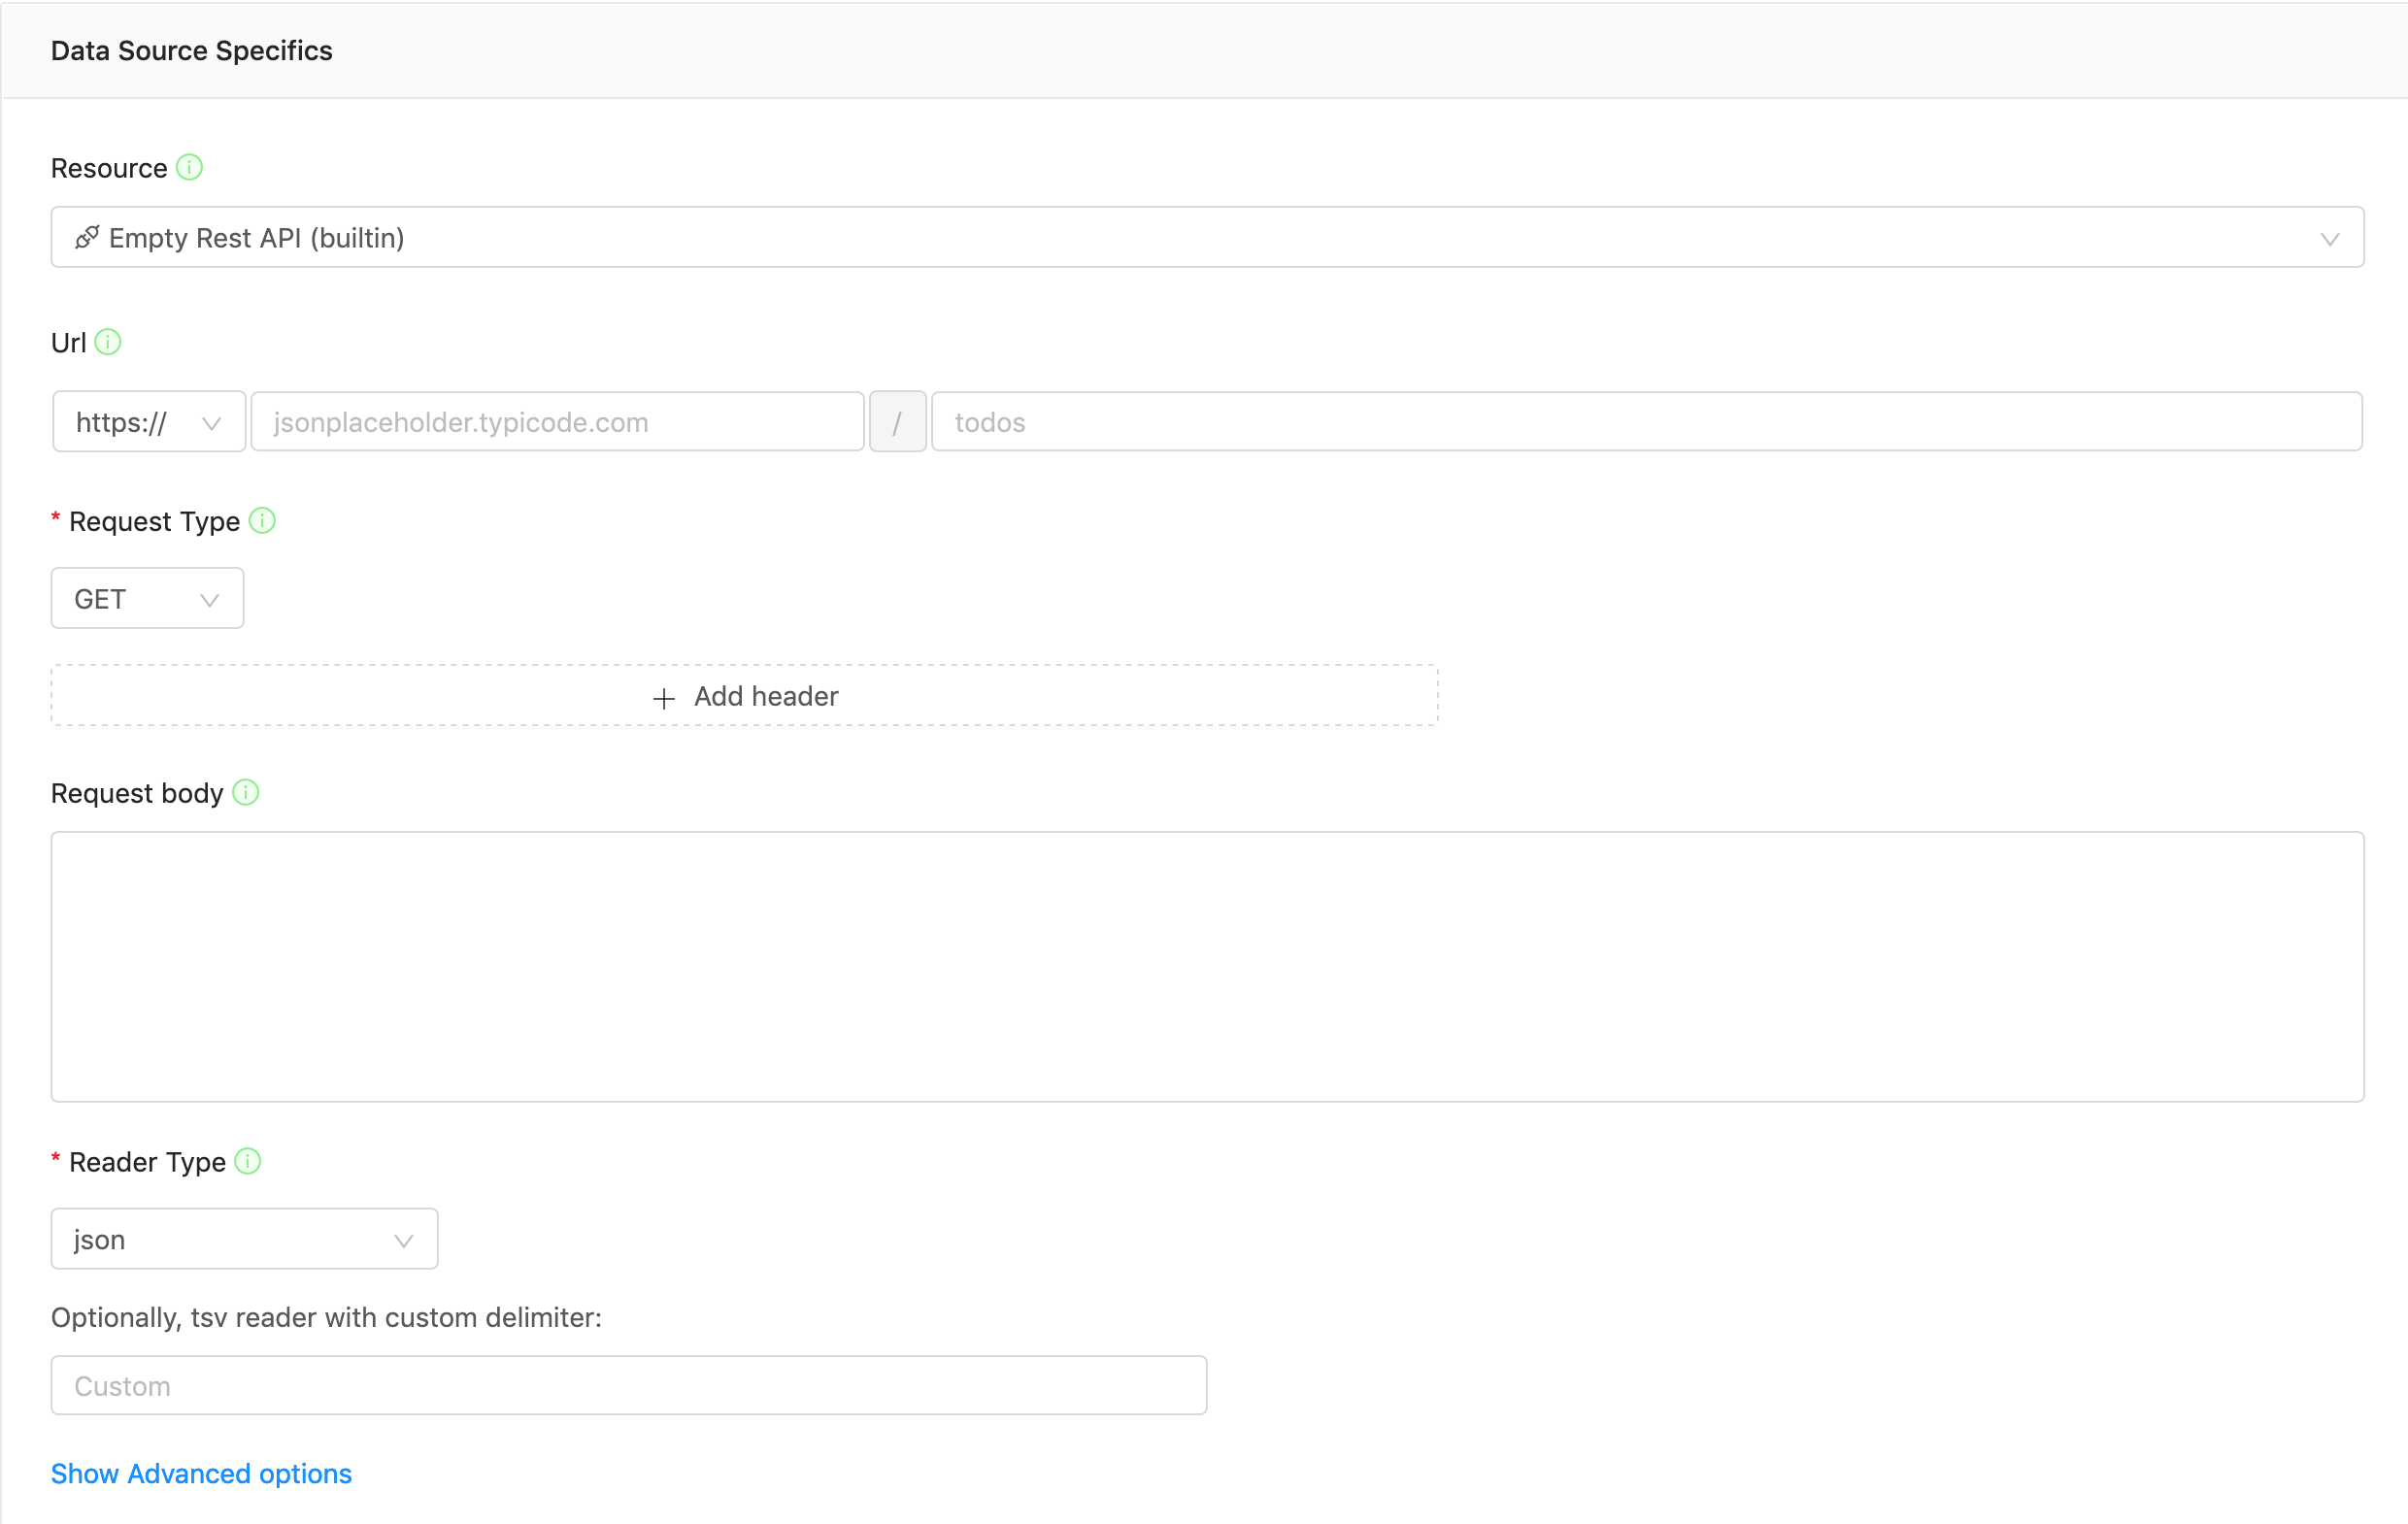
Setting headers manually
To set the headers manually, e.g. (with Authentication Token Bearer), click + Add header and set the keys and the values.
For example, if you have a Bearer token, your headers may look something like this:

Set sensitive headers inside a resourceAs a best practice, add sensitive headers such as the bearer token inside a Rest Api Resource, instead of inside the Rest Api query itself.
Using Basic Authentication
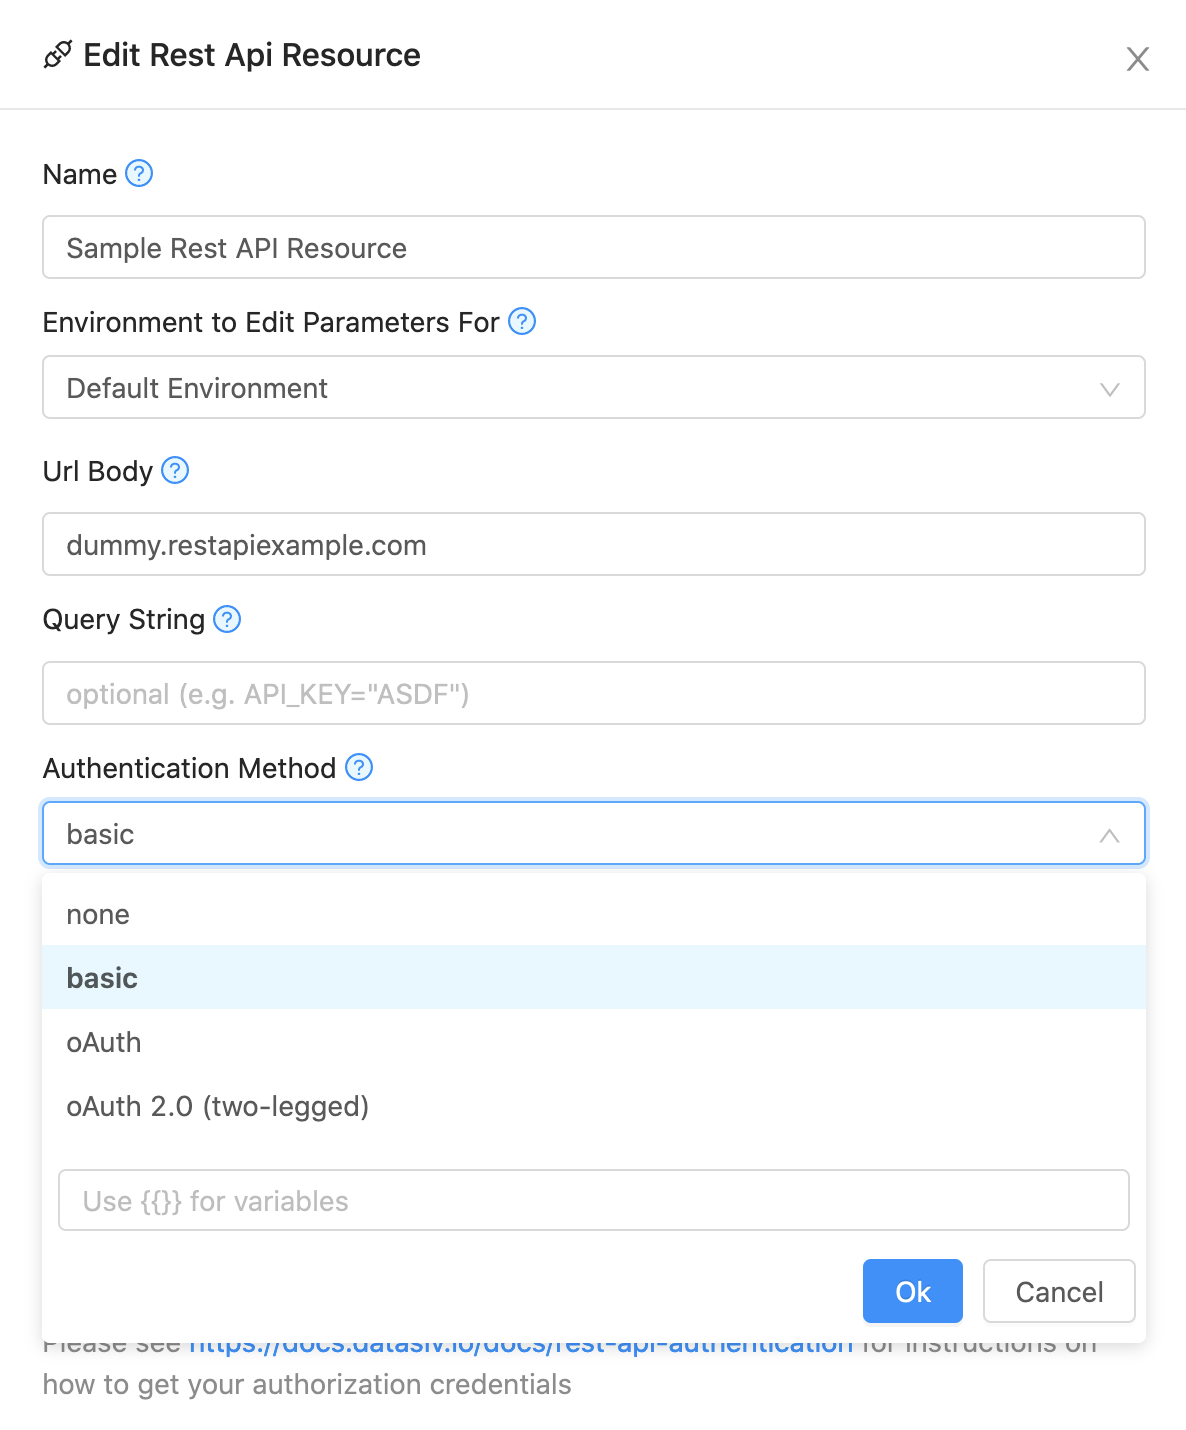
To use basic authentication, click click on the Resource tab and click Add New Resource. Set the Authentication Method to basic.
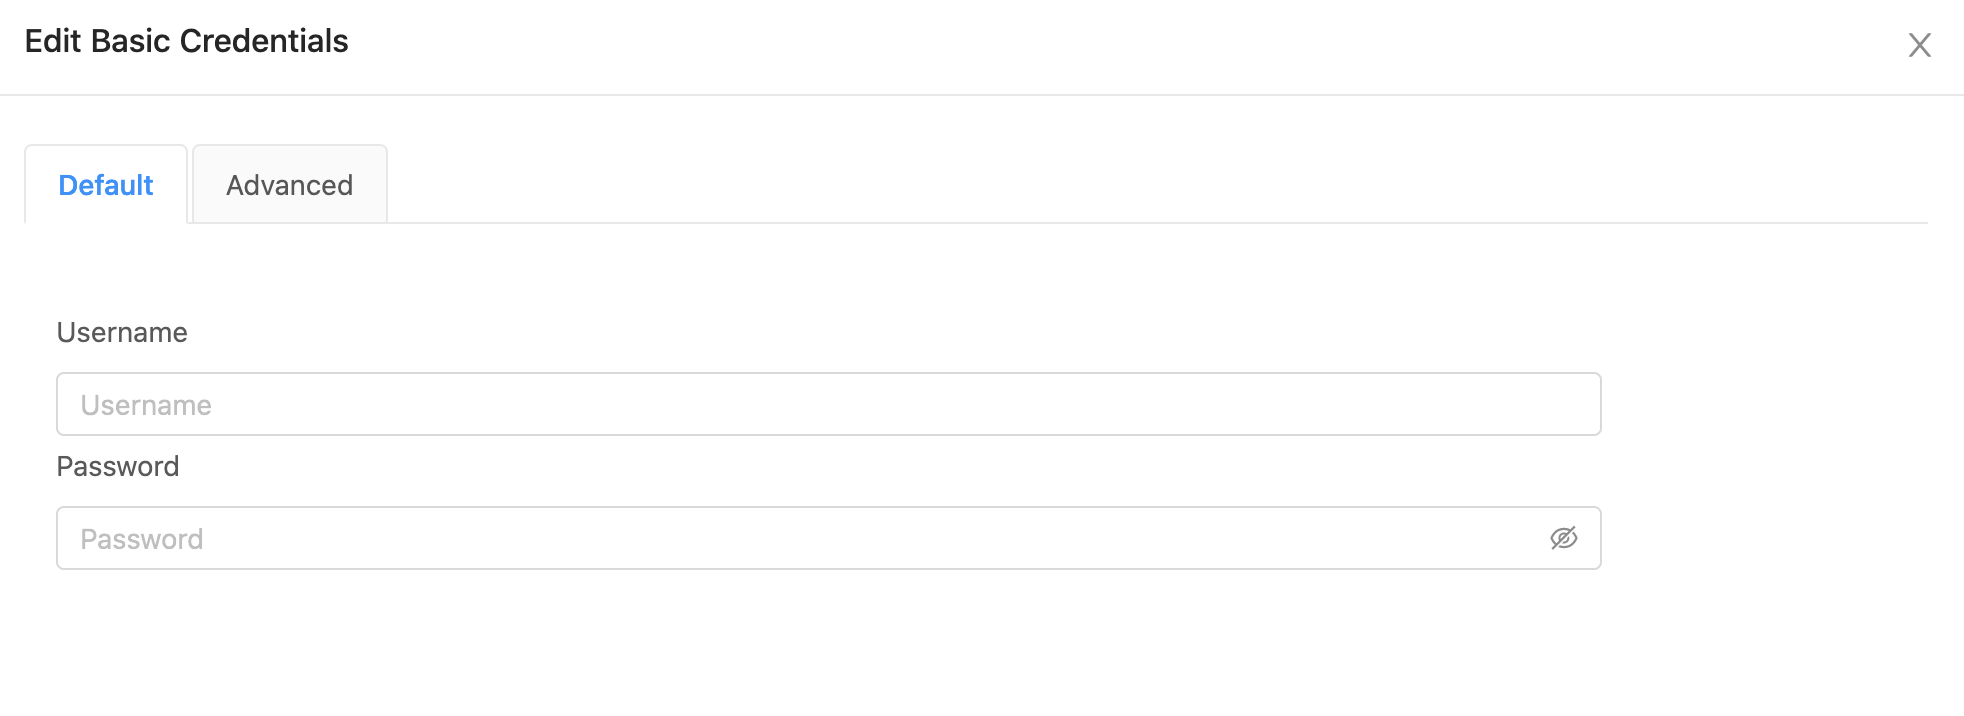
Then, click the Edit Basic Credentials button and input your credentials.
Using OAuth 2.0
To setup OAuth2.0, click on the Resource tab and click Add New Resource. Set the Authentication Method to oAuth.
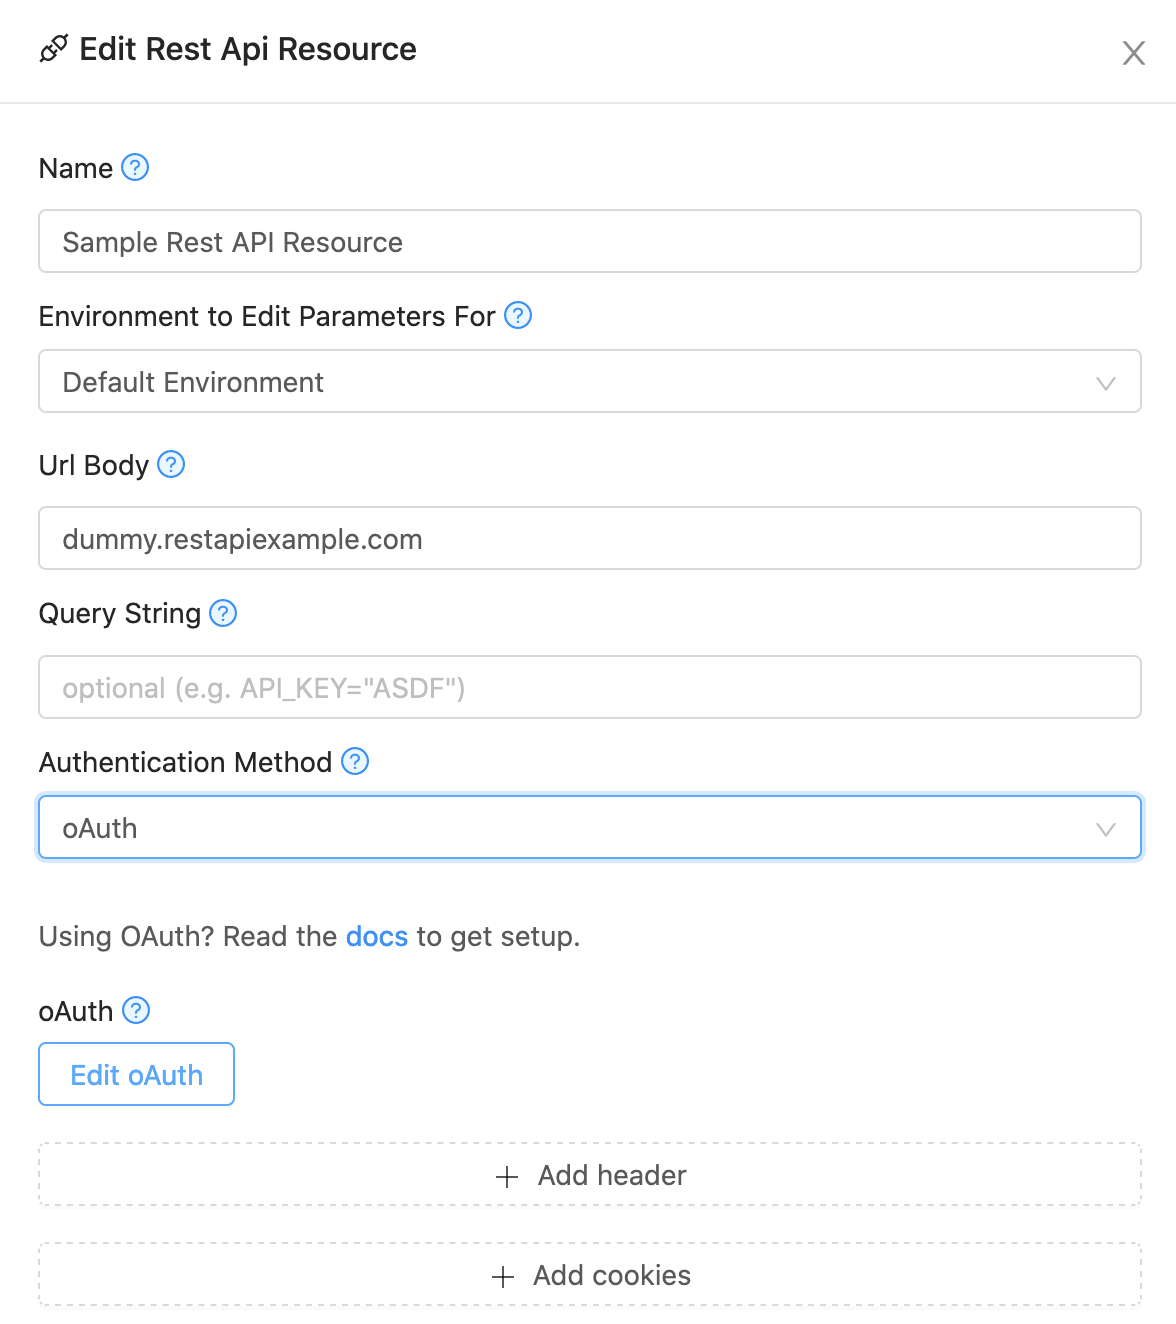
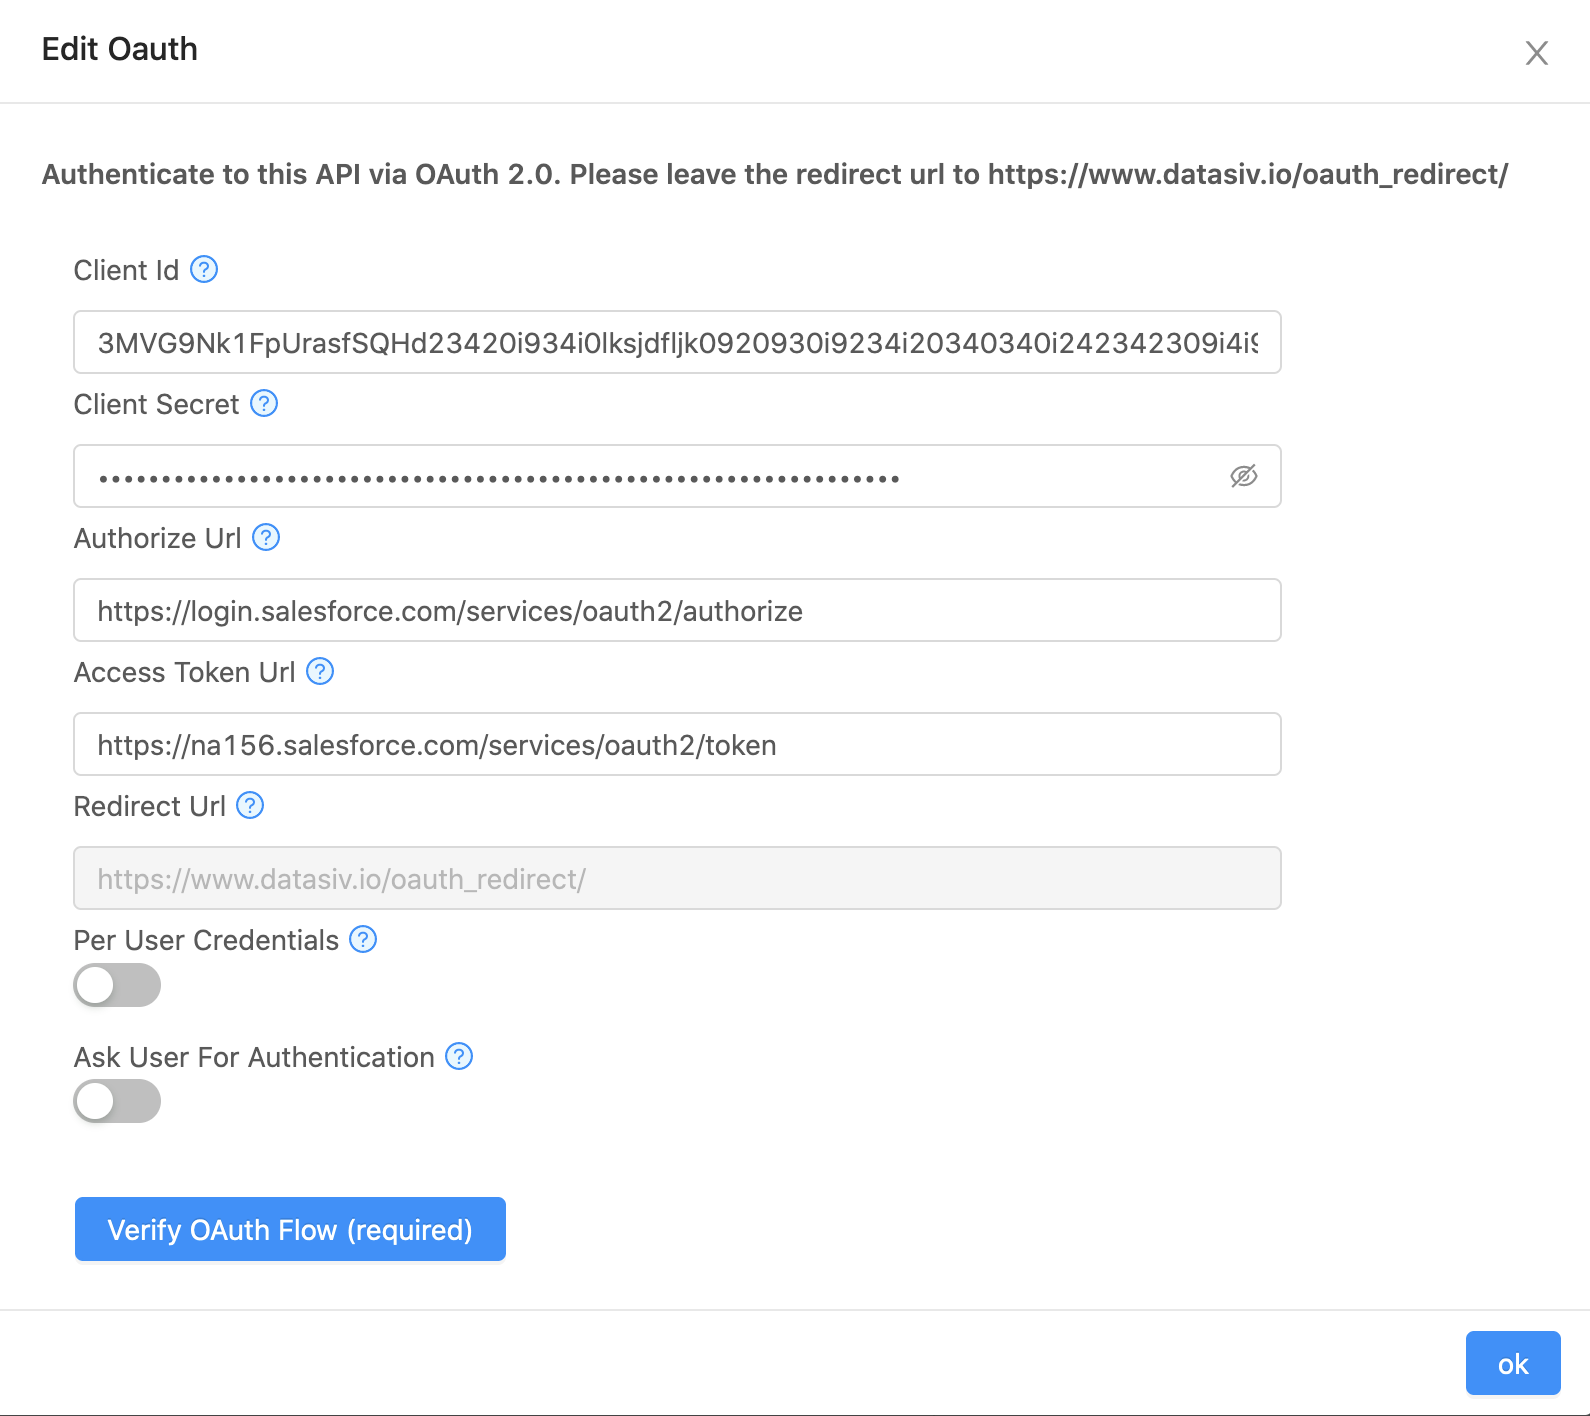
Click Edit oAuth to put in your credentials. If you are authenticating using OAuth 2.0, please provide the Client Id, Client Secret, Authorize Url, and Access Token Url. The end user will see a login screen, and then all parts in the URL and headers with %%OAUTH_ACCESS_TOKEN%% will be replaced with the proper access token. For how to use these parameters, please see https://www.oauth.com/oauth2-servers/client-registration/client-id-secret/ for more information.
Using OAuth 2.0 Two-Legged Authentication
To setup OAuth2.0, click on the Resource tab and click Add New Resource. Set the Authentication Method to oAuth 2.0 (two-legged).
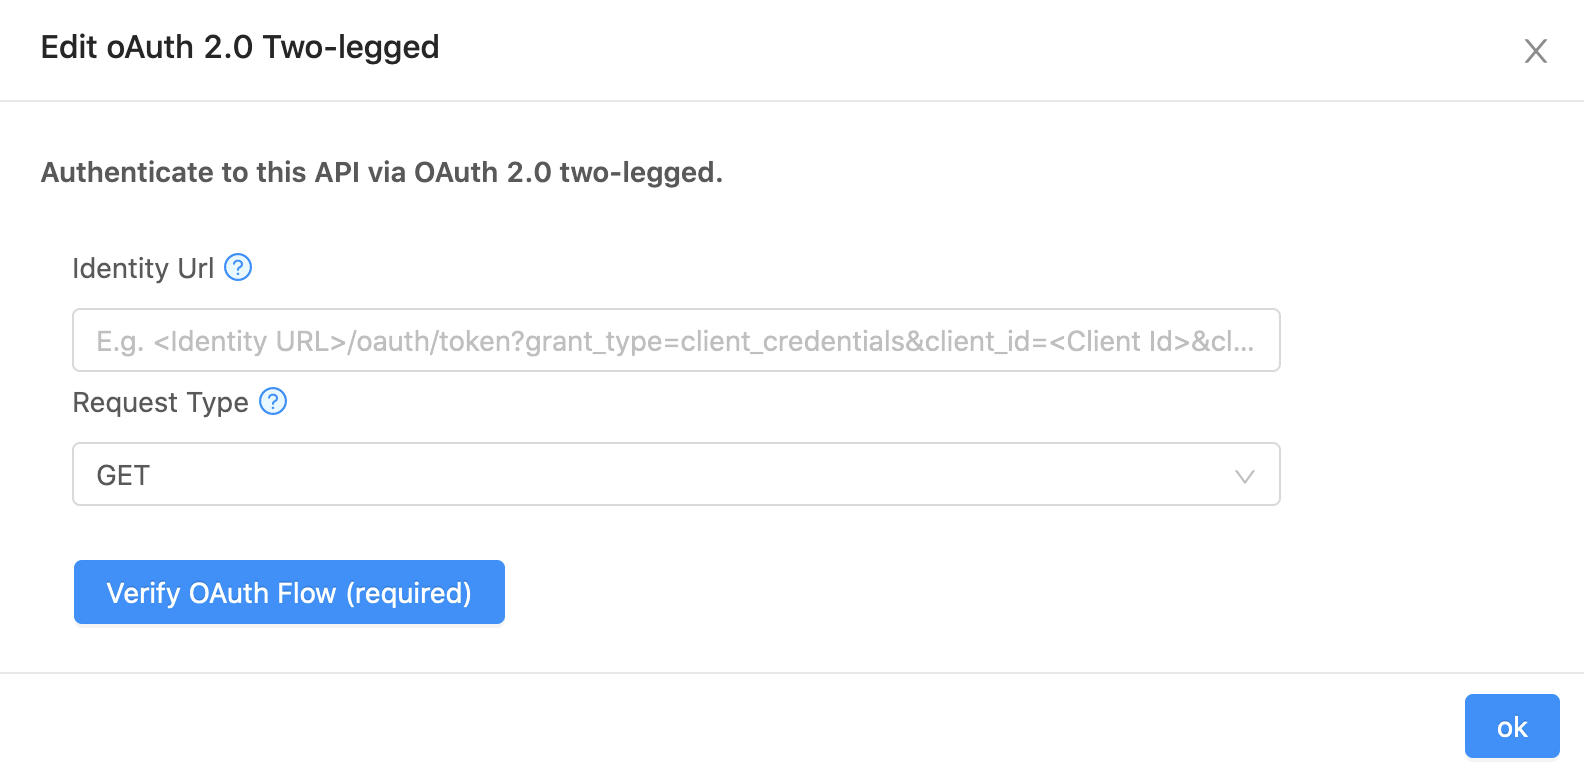
Similar to the oAuth 2.0 method, input in your credentials, and click the Verify OAuth Flow (required) button. You should be good to go!
For OAuth 2.0, set the redirect url to https://www.datasiv.io/oauth_redirect and enable refresh tokensFor our system to work properly, the redirect url must be
https://www.datasiv.io/oauth_redirectand our system must be able to issue "refresh_token" requests to the OAuth endpoints.
Finally, click *Verify OAuth Flow**. Once the flow is verified you're able to use OAuth tokens when issuing Rest API calls.
Using OAuth 1 (Token-Based Authentication)
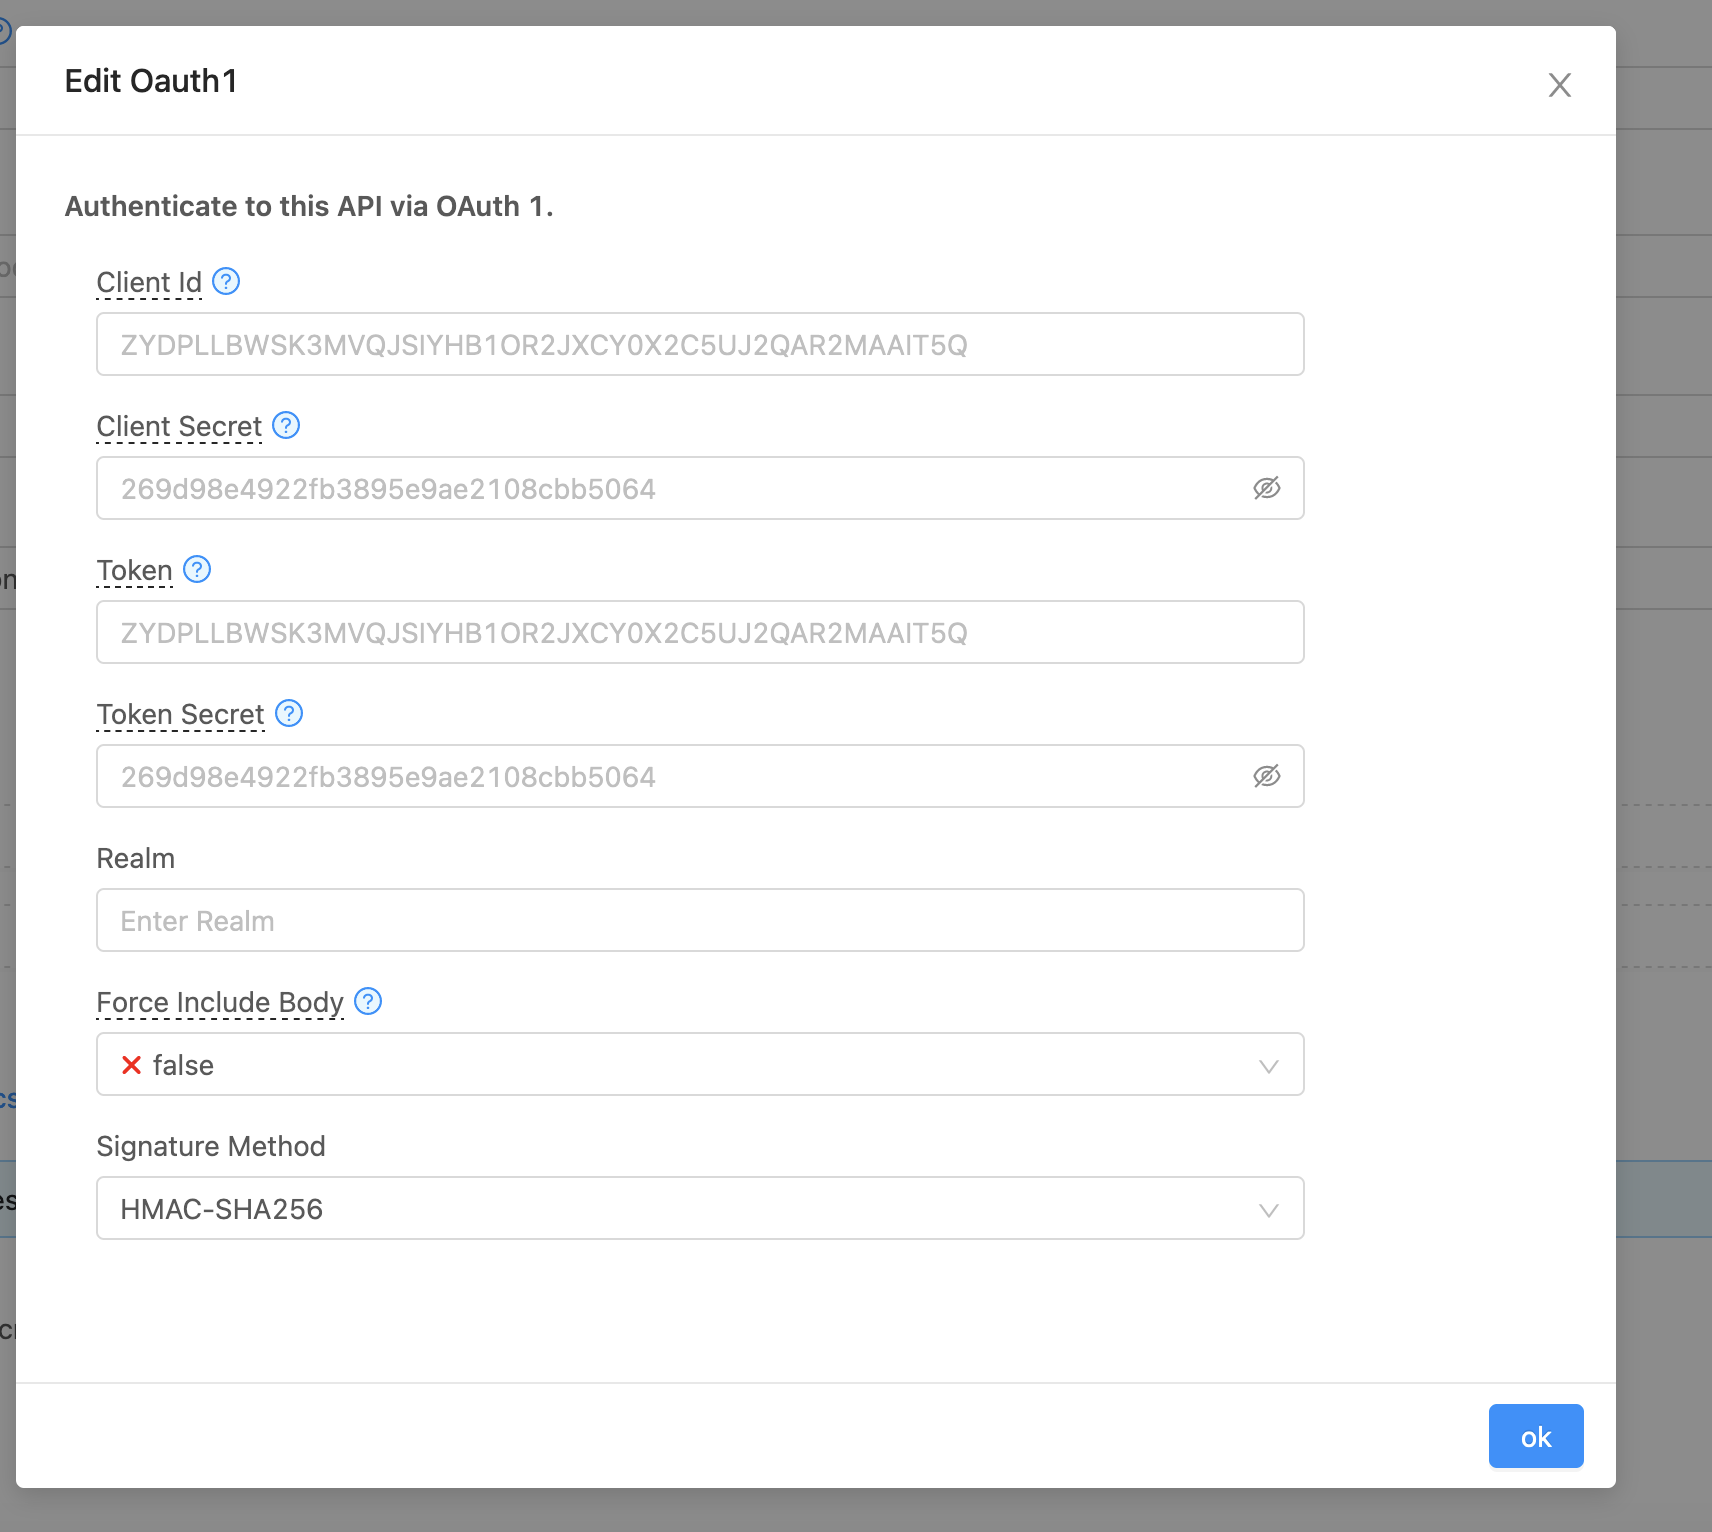
To setup OAuth 1, click on the Resource tab and click Add New Resource. Set the Authentication Method to oAuth1 (token-based authentication) and fill out details in the form below. No additional verification or user input is required.
Enabling Per User Authentication for OAuth Flows
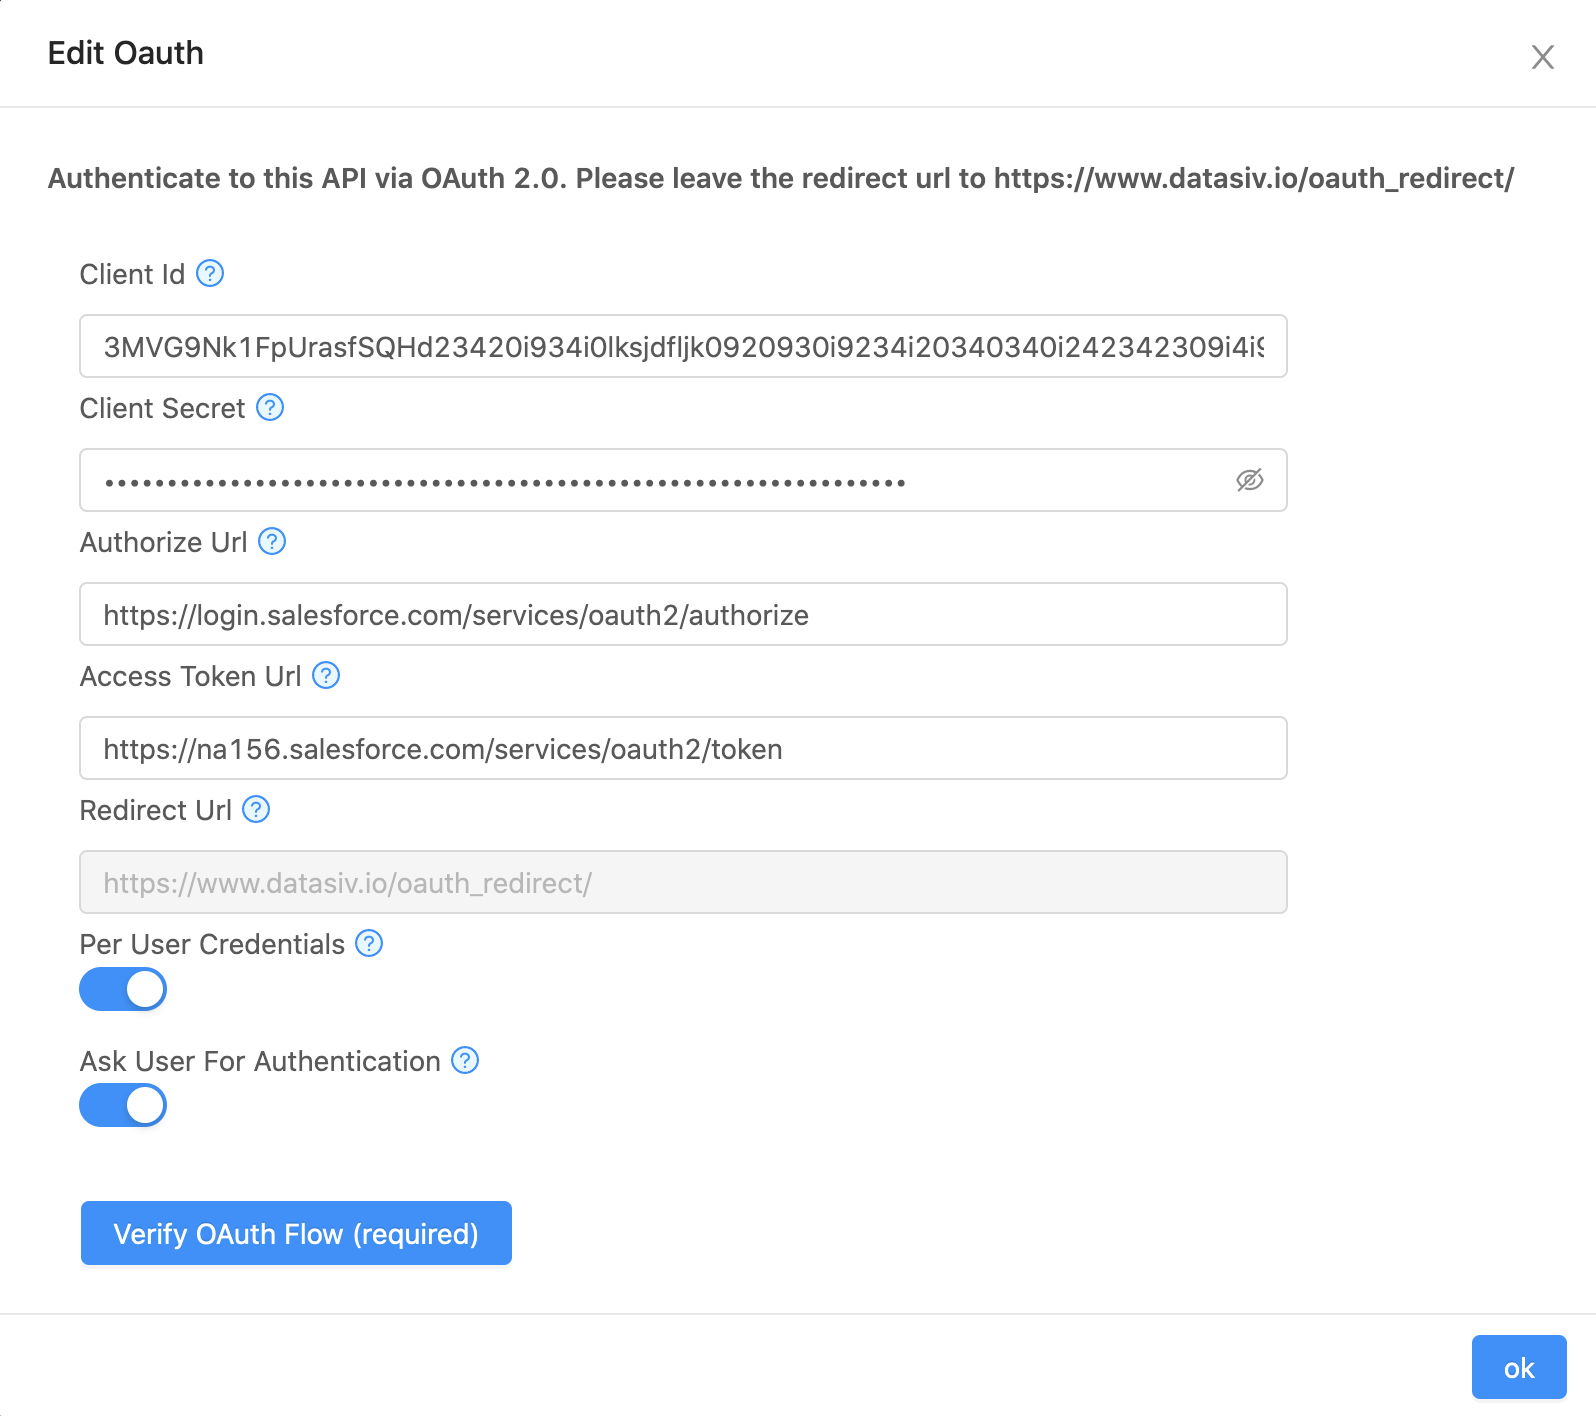
To enable per user credentials as opposed to shared credentials for the organization, toggle the Per User Credentials Button.
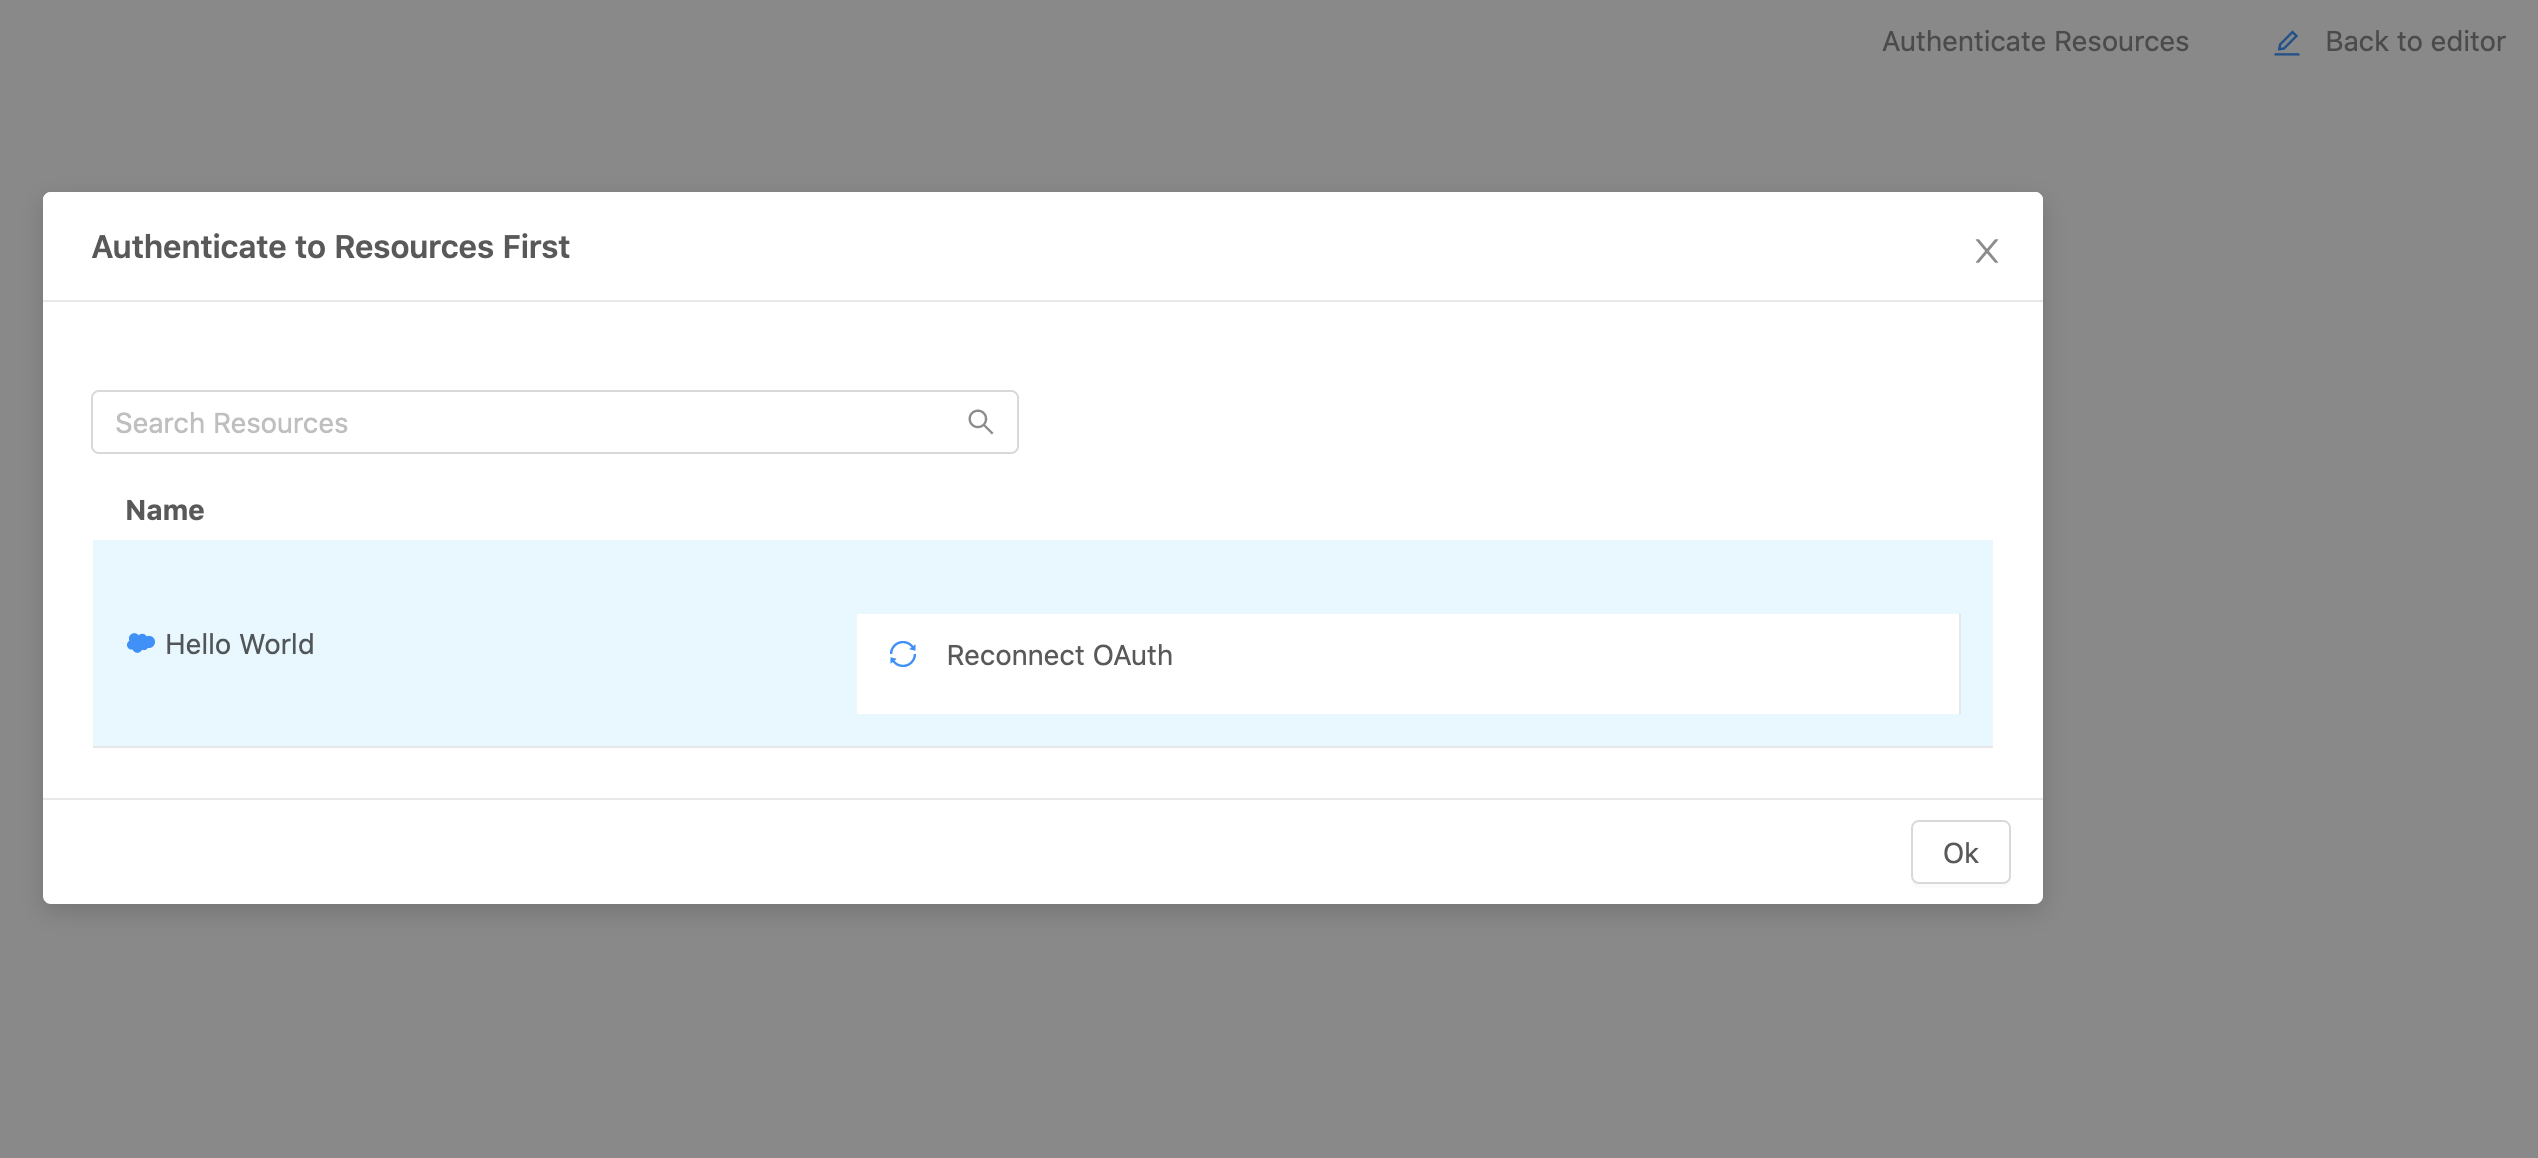
If you want to ask end users to authenticate prior to using an app that has resources with per-user credentials. Toggle the second switch called Ask User for Authentication. When that switch is toggled on, if a user is viewing an app in end-user mode for which contains OAuth resources they haven't authenticated to, they'll have an interstitial pop up where they can authenticate in app (see screenshot below).
Updated 8 months ago
