
Quickstart
Build your first hello world app in Datasiv.
In this quickstart, we'll show you how to build your first application in Datasiv.
We'll read data from a database, display it in a table, allow users to search through it, and download a CSV file with selected data from the rows.
This quickstart requires you to create an account for Datasiv.If you haven't already, please sign up here
This application will highlight three of Datasiv's four core components,
- Data queries (Add Data Query option from the top, used to read and write to disparate sources such as Rest APIs, SQL databases, GraphQL endpoints, etc.)
- Frontend components (Add Frontend Component left pane, used to drag user input fields, forms, tables, buttons).
- Transforms (Add Transform option on the top, used for pre/post processing the data, filtering it, aggregating it across multiple data sources, running client side SQL on it)
- {{}} Used to build dynamic applications and link one component to another (e.g. take a user input and put it into a database query)
.png")
What are {{}} good for?Based on Django's templated
{{}}syntax, the special{{}}expression allows you to substitute in values from one set of app objects in your application to another. In this instance, from the diagram below, we would like to reference a selectedRow property from the table0 component. All frontend component properties are stored under the global data key, hence, we type in{{data.table0.selectedRow}}
All DataSiv App Objects are stored in a global key value store called App Objects (right menu). You're able to dynamically reference any property from the App Objects into any property of queries, transforms, analytics and frontend components using {{}}.
.png")
For an overview of more advanced functionality that involves machine learning, please go to the Time Series Forecasting section.
Create your application
First, go to the Projects tab and click Add New App. We will title our app Hello world, with url helloworld. This means our app will be available from the link https://www.datasiv.io/helloworld.
Add Frontend Components
DataSiv allows you to drag frontend components into a grid. These components include simple text fields, tables, charts, as well as input components such as forms. You arrange these components in what-you-see-is-what-you-get, interactive user interface for your teams to use.
Let's see this in action!
To start off, drag a text component from the left sidebar. Set the Text property to Search Database and the Size property to title-4.
.png")
Next, add a Table component component. We will display the data in the table.
Add Search from the Add Frontend Component tab. This will allow us to search the table.
.png")
Add Transform
To allow users to search the Artists table in our database, we would like a parametrized sql query, Select * from Artists WHERE Name like %userQuery%, where %userQuery% will be the values that the user types in.
Datasiv allows you to construct parametrized SQL queries from user input, both for insertion and reading from a database.
To construct this query, we will first preprocess the user input append % to the start and end of the searched input as we want a wildcard, and then substitute the preprocessed input into a sql query, which we will then display in the table.
.png")
To begin, please click the Add Transform option on the top menu. We currently allow you to write custom javascript code to transform any inputs that you provide. Choose Javascript.
.png")
For the Javascript code option, type in the following code:
  let data = '%' + {{data.search0.value}} + '%'
data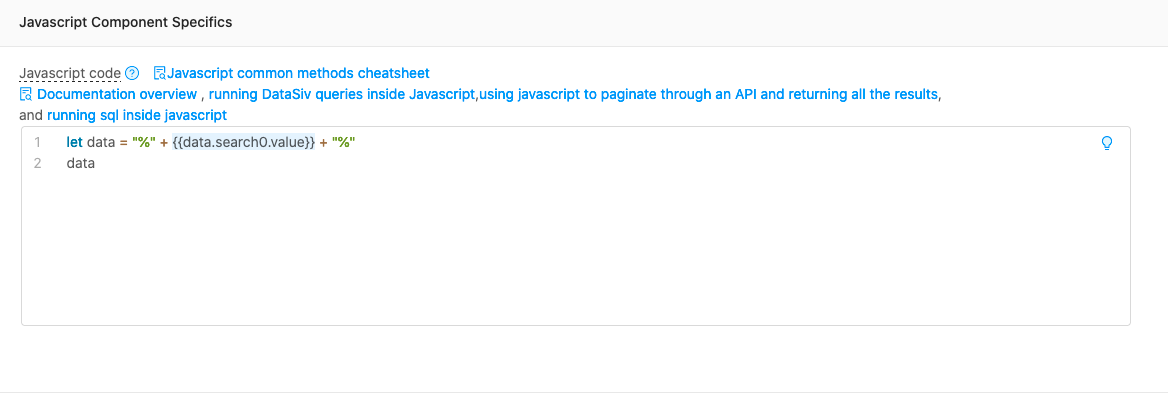
Click Back to main editor on the right top, followed by Add Data Query.
.png")
Choose Sql Api for your data source, and click next.
.png")
For the data source specifics, please select the Chinook DB (builtin) (readonly) resource, which will connect to our sample database, and the following SQL query: Select * from Customers where FirstName like {{data.javascript0.result.output}}.
.png")
Click next, set Automatic Execution to On Document Load, which will reload the query every time a user updates the search field.
Set the ID field to sql0, we will reference this query in our system, and click Save Query.
.png")
Finally, go back to the main editor, click the Table component, and change the Data property of the table to queries.sql0.data. This will connect the table to the query component.
.png")
Finally, we'd like for the user to be able to select and download a row from the table.
Drag a download button from the left side menu, and set the Data property to data.table0.selectedRow.
.png")
Congratulations! Your application is now done. Click save on the left menu and click View App (top left), which will show your application in production mode.
.png")
Now if you search, the table will update.
.png")
You're also able to download a selected row with the download button.
.png")
Updated 9 months ago
If you don't want to build your own application and instead want to use our templates, please go to the one-click deploy templates section.