
Salesforce Authentication
Authenticating with Username + Password + Security Token
If you have SSO enabled, you cannot use Security Token authentication, and must use OAuth.
First, to create a new Salesforce Resource, go to https://www.datasiv.io/resources and click Add New Resource
Set the Instance_url to your instance url (e.g., myinstance.my.salesforce.com) . Set the username to your username, password to your password, and security token to your security token. Then you should be good to go!
Finding your Salesforce Instance URLFor help with finding your salesforce instance url (e.g. myinstance.my.salesforce.com) go to the following help URL [https://help.salesforce.com/articleView?id=000322728&type=1&mode=1](https://help.salesforce.com/s/articleView?id=sf.faq_domain_name_what.htm&language=en_US&type=5)
It should be the subdomain from myinstance.lightning.com or myinstance.salesforce.com

Getting your security tokenIf you need to get a new security token, go to setup, and under My Personal Information click Reset My Security Token. This will send you a new security token to your email you can use for this integration.
.png")
Authenticating with OAuth
Many applications require authentication schemes with OAuth 2.0. This page shows you how to authenticate from DataSiv into Salesforce with OAuth.
.png")
First, navigate to setup by clicking the tool icon on very right and then Setup or going to https://YOUR_SUBDOMAIN.lightning.force.com/lightning/setup/SetupOneHome/home.
Click on App Manager under Apps to open up the Lightning Experience App Manager.
First, create a new Connected Application by clicking on New Connected App in the Salesforce Lightning editor.
.png")
Click Enable OAuth Settings, and make sure to set the callback URL to:
https://www.datasiv.io/oauth_redirect/
For Selected OAuth Scopes, select Perform requests on your behalf at any time (refresh_token, offline_access) as well as additional scopes for your application. Depending on your scope, you should either add Access and manage your data (api) for standard SOQL/update queries or Full access (full) for full scopes.
.png")
Make sure to set the perform requests on your behalf at any timeThis enables the application to use a refresh_token so you don't have to authenticate every time for every single query.
Under API (Enable OAuth Settings), uncheck the Secret boxesLeave the Require Secret boxes unchecked
.png")
Finding your Salesforce Instance URLFor help with finding your salesforce instance url (e.g. myinstance.my.salesforce.com) go to the following help URL [https://help.salesforce.com/articleView?id=000322728&type=1&mode=1](https://help.salesforce.com/s/articleView?id=sf.faq_domain_name_what.htm&language=en_US&type=5)
It should be the subdomain from myinstance.lightning.com or myinstance.salesforce.com
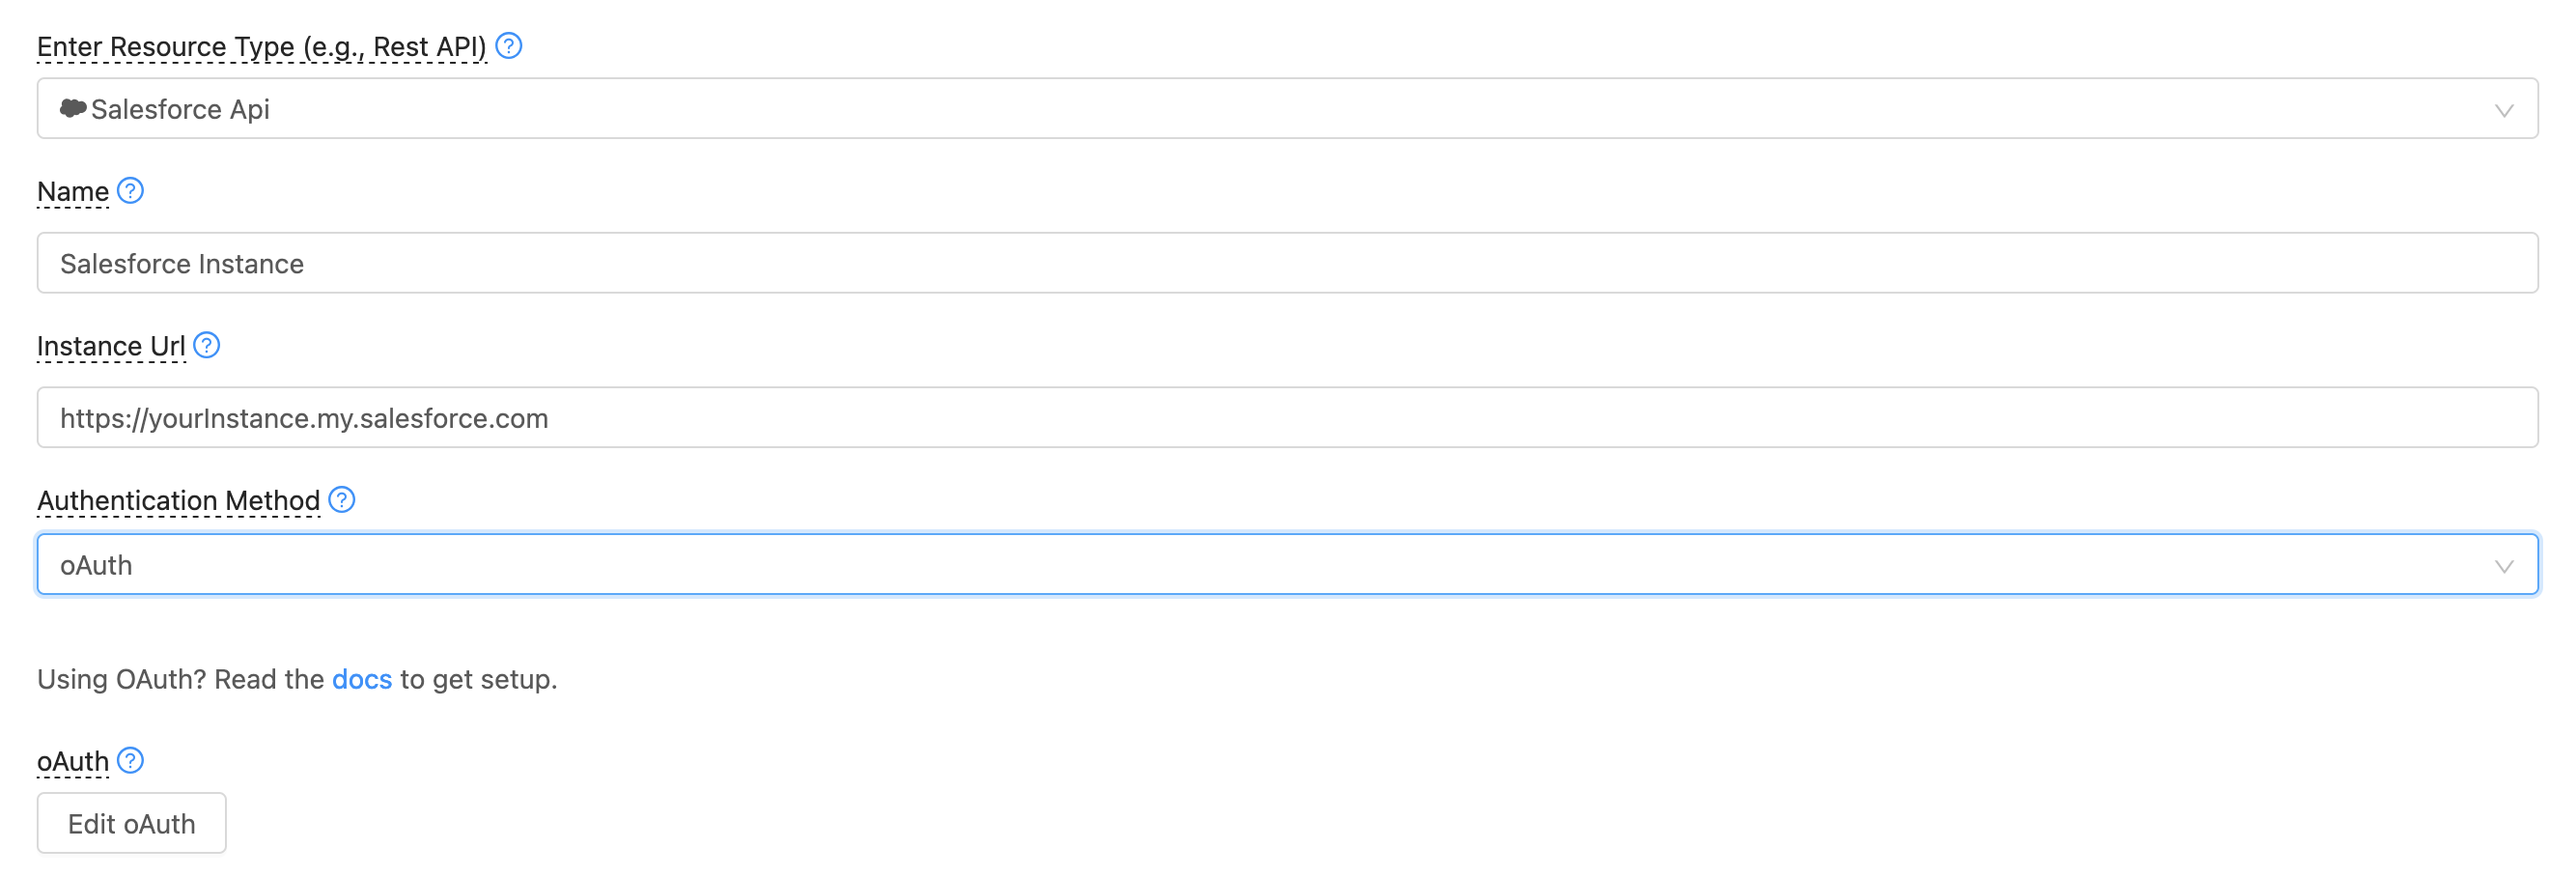
Now you're able to authenticate via OAuth when creating a new Salesforce Resource. To create a new Salesforce Resource, go to https://www.datasiv.io/resources and click Add New Resource
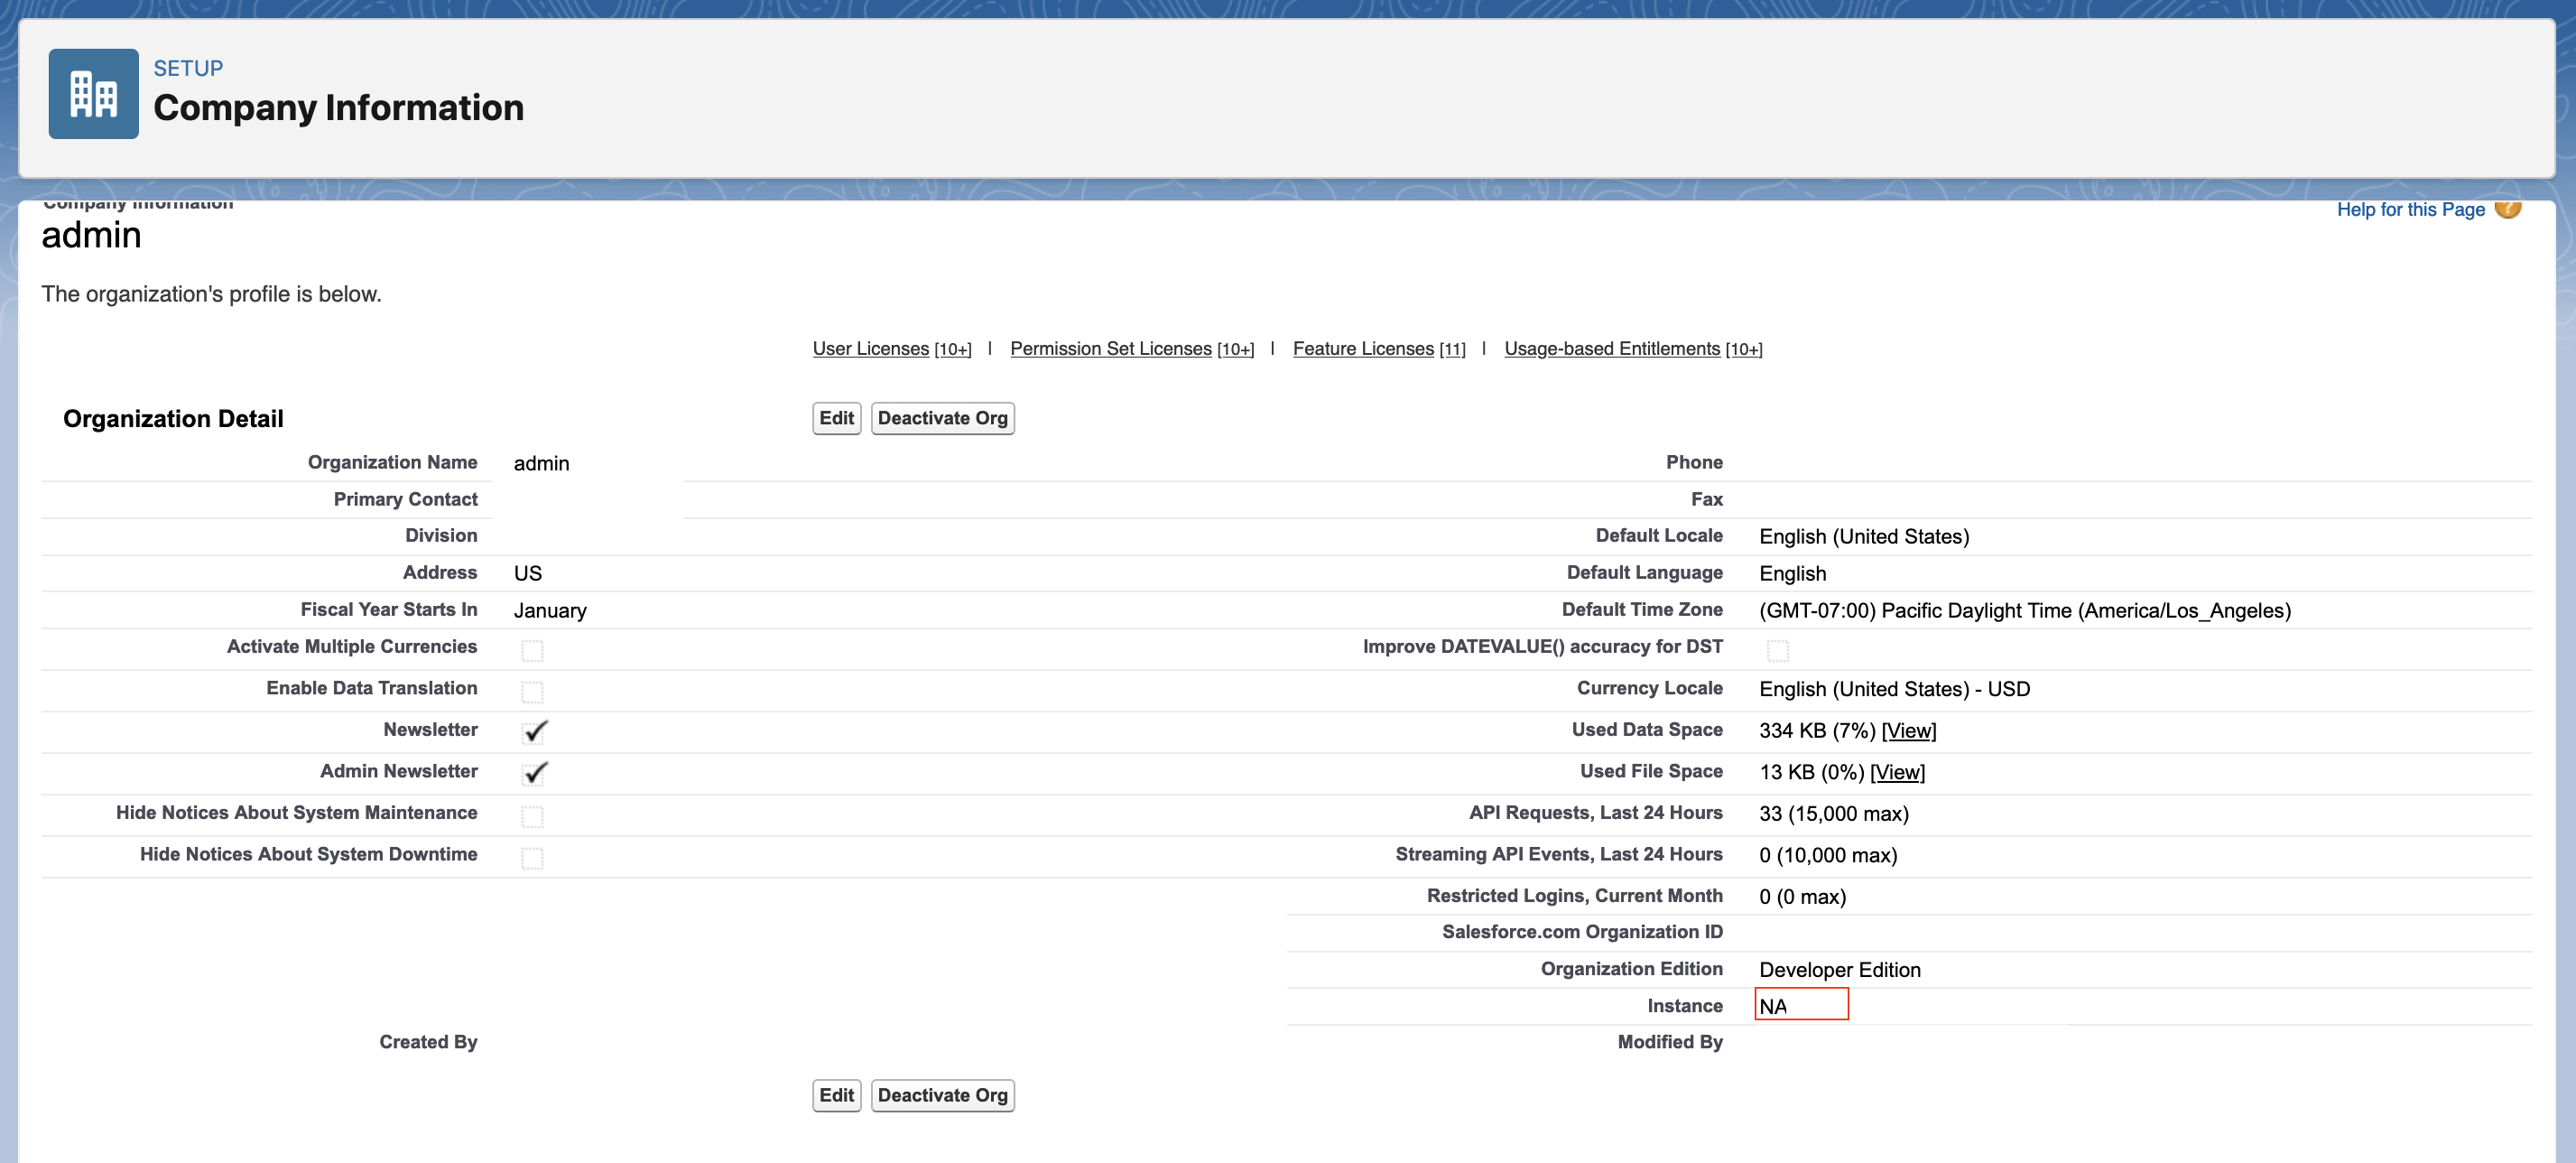
Here's an example below of where to find your instance url in Salesforce lightning. If you go to
https://{YOUR_SUBDOMAIN}.lightning.force.com/lightning/setup/CompanyProfileInfo/home, you should see it on the right hand side (e.g. in the example below, it should be NA156)
Set the Instance_url to your instance url and choose oAuth as your Authentication Method.
Next, click Edit oAuth. Set client id to the connected application's consumer key and client secret to the connected application's consumer secret.
Make sure to set the authorize url to: https://login.salesforce.com/services/oauth2/authorize, the access token url to: https://INSTANCE_NAME.my.salesforce.com/services/oauth2/token, and the redirect url to: https://www.datasiv.io/oauth_redirect/
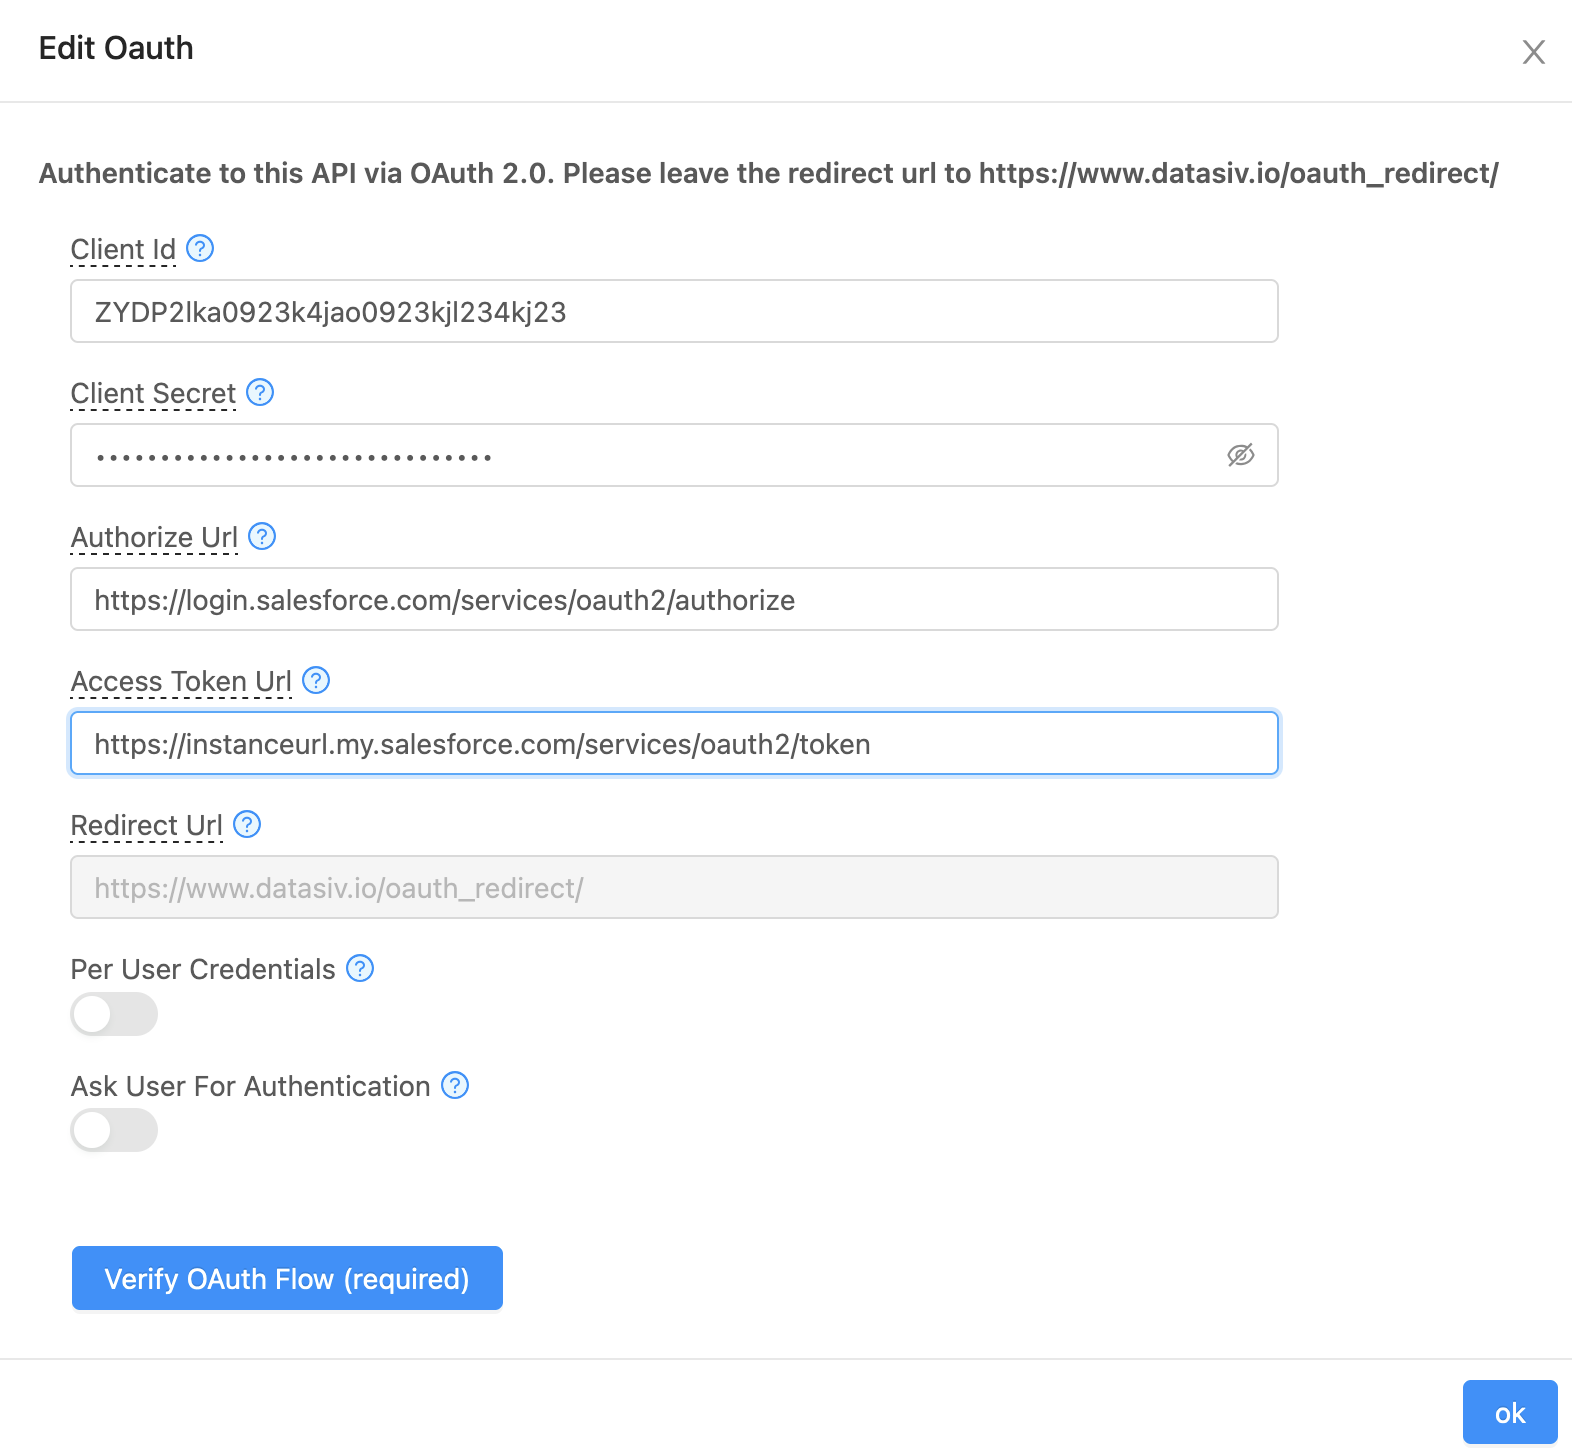
Click Verify OAuth Flow, go through the instructions.
Verify OAuth Flow is required for this application to workThe Verify OAuth Flow wizard fetches the necessary credentials so DataSiv can reauthenticate into Salesforce when running queries.
Finally, click save. Your new resource should now be created, and you're able to run Salesforce queries in DataSiv.
For one-click deploy, use our Salesforce OAuth TemplateOur Salesforce OAuth Template allows you to deploy a CRUD panel on top of your new Salesforce resource instantly.
Updated 8 months ago